Salesforce Custom IDP
Overview
LoginRadius supports Single Sign-On (SSO) via SAML 2.0, enabling seamless integration with enterprise identity providers such as Salesforce. By configuring Salesforce as a Custom Identity Provider (IDP), you can allow users to authenticate using their existing Salesforce credentials, providing a secure and streamlined login experience across your applications. This integration allows you to:
- Authenticate users through their existing Salesforce accounts.
- Provide secure, streamlined access to your applications.
- Customize the login experience via LoginRadius’s hosted or embedded login interfaces.
- Leverage federated identity management with SAML support.
Use Cases
This setup is ideal for:
- Organizations that use Salesforce as their centralized identity provider.
- Businesses that are looking to simplify user onboarding and management across multiple applications.
- Enterprises that require SSO for internal tools secured by Salesforce.
- Multi-tenant SaaS platforms that need to enable organization-specific Salesforce SSO.
Key Features
- Seamless SSO with Salesforce for a unified and secure login experience across applications.
- Centralized identity management and attribute mapping to keep user data consistent and synchronized.
- Flexible, secure SAML 2.0 integration options, including AutoLookup, auth studio, and customizable login flows.
Configuration
To integrate Salesforce with LoginRadius as a Custom Identity Provider, you must complete configuration steps in both the Salesforce Setup Console and the LoginRadius Console. The process involves registering LoginRadius as a SAML service provider in Salesforce and then adding the corresponding configuration details to your LoginRadius Console.
Salesforce Provider
Loginradius Console
Before configuring LoginRadius, you must first set up LoginRadius as a SAML service provider within Salesforce.
Step 1: Log in to your Salesforce account as a System Administrator.
Note: If you do not have a Salesforce account, please contact your Salesforce administrator or the Salesforce support team.
Step 2: Click your profile icon in the top-right corner and select Switch to Salesforce Classic, as shown in the screenshot below.

Step 3: Click the Setup button in the top menu.
The following screen will appear:
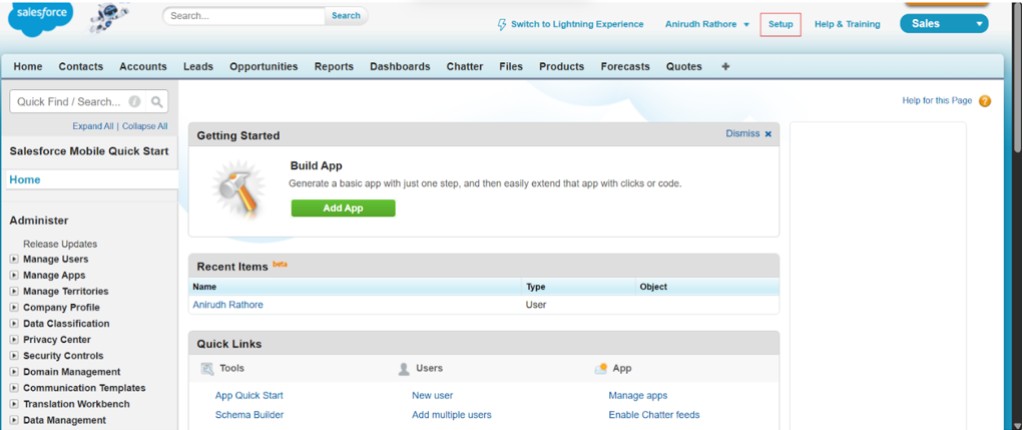
Step 4: In the left panel, navigate to the Administer section.
Step 5: Add a custom subdomain to your Salesforce account. To do this, follow the steps below:
- Navigate to Domain Management as shown in the screen below, then click My Domain. Select Edit under My Domain Details, enter your desired domain name, register it, and wait for the registration to complete.
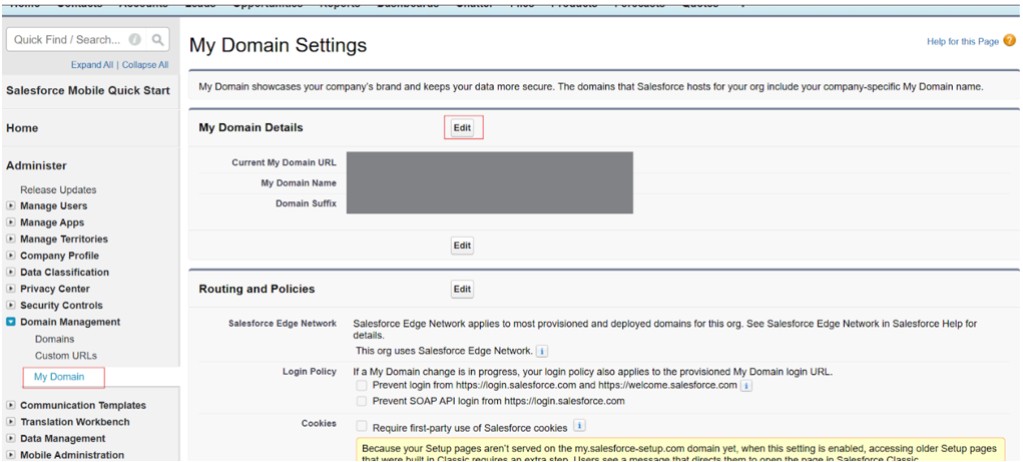
Note: Create a subdomain for your Salesforce organization, ideally using your company name to make the URL easier to identify.
For example: https://yourcompanyname.my.salesforce.com.
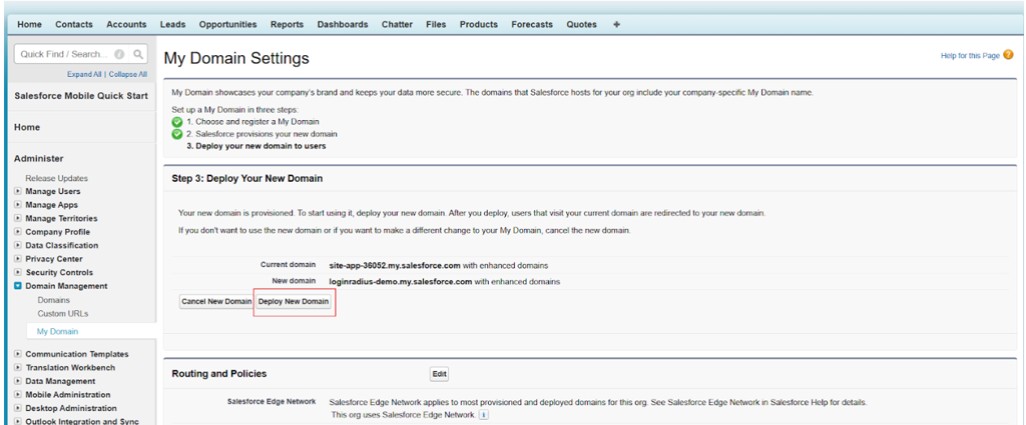
- Click Deploy New Domain to apply the custom domain to your organization, and wait for the deployment process to complete.
Step 6: Navigate to the Security Controls > Identity Provider Settings page as shown in the screen below, to configure Identity Provider Setup in your Salesforce account.
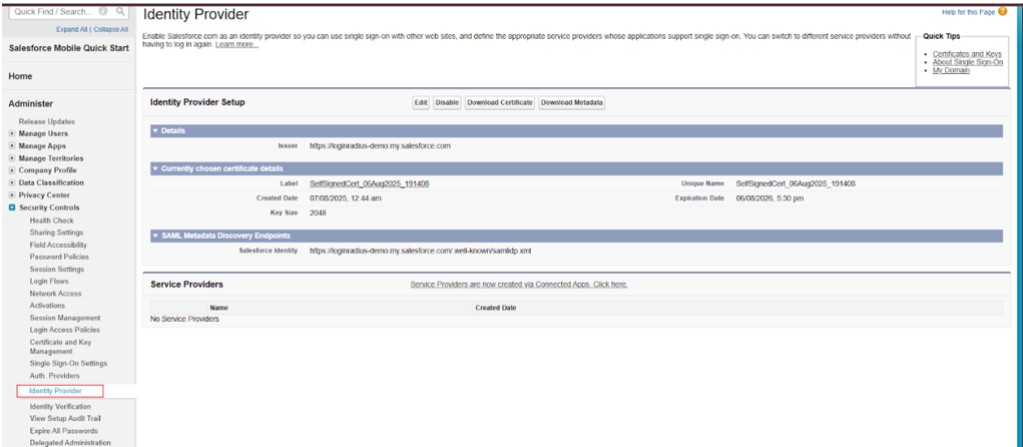
Step 7: Enable the Identity Provider if it is not already enabled. Click Edit to proceed. You will see the following page:
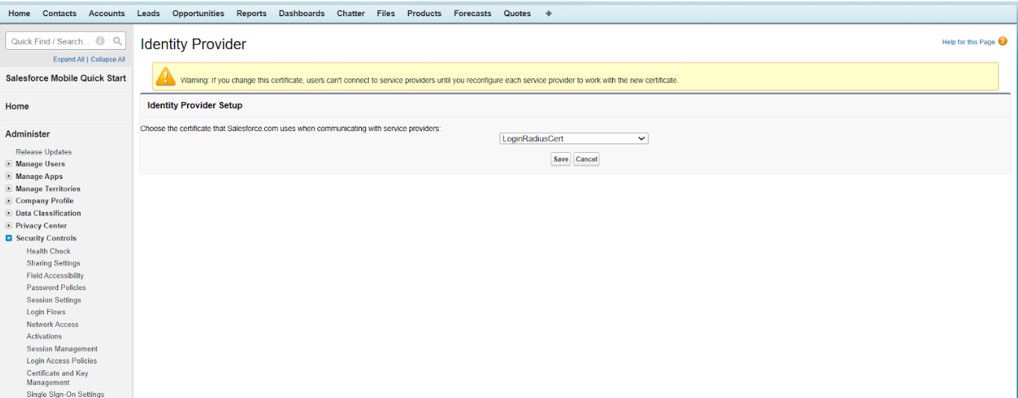
Step 8: Choose an existing certificate or generate a new one. If you create a new certificate, you will see the following page:

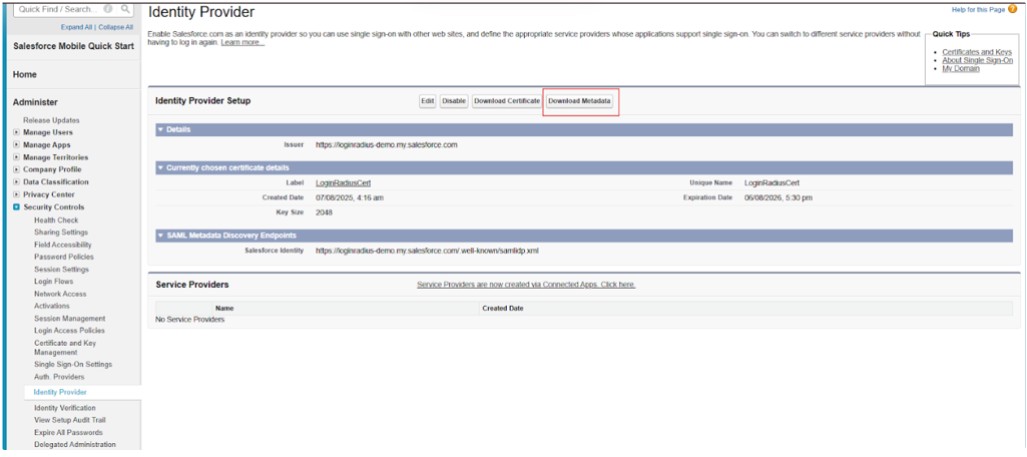
Step 9: After setting up the certificate, download the metadata by clicking Download the metadata.
Step 1: Log in to your LoginRadius Console, navigate to Authentication > Custom IDPs, and click Add Custom IDP.
Step 2: To configure the details in the Console, select the Salesforce option from the screen. The corresponding app configuration fields will then appear.

Step 3: If you prefer to configure using the metadata received from Salesforce, click Configure from Metadata, upload the .xml file, and then continue from Step 8. Otherwise, follow the manual steps below.
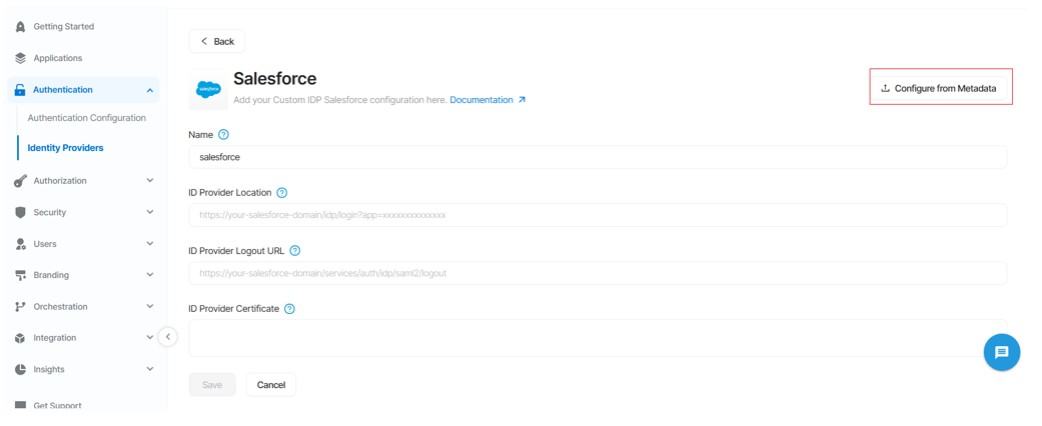
Step 4: In the Name field, enter the same app name that you configured in the Salesforce application. LoginRadius uses this name to identify the originating request source.
Step 5: In the ID Provider Location field, enter the endpoint to which an SP sends assertions using the protocol and binding it shares with the IdP.
Step 6: In the ID Provider Logout URL field, enter the sign-out endpoint you provided by Salesforce.
Step 7: In the Id Provider Certificate field, enter the same certificate value that you added in the Salesforce application.
Step 8: Click on Save.
Step 9: After returning to the Custom IDPs page, click on the provider just created.
Step 10: Enable AutoLookup to automatically redirect users to the specified custom Identity Provider (IdP) after they enter an email address that matches the configured domain. If AutoLookup is disabled, users will follow the regular login workflow. When AutoLookup is enabled, this IdP will not appear as an option in the Social Schema (the list of available social and federated login providers shown by LoginRadius).

Step 11: If the desired data is not already mapped, click Add Row under Data Mapping and add the required mapping.
Step 12: If AutoLookup is not enabled, enable the Include in Social Schema toggle. This ensures that the IdP appears in your Social Login interface.
Step 13: Click on Update.
If you encounter any issues during the setup, feel free to contact our support team here.