Facebook App Review
Many of the Social Providers review the app before you switch your app to Live mode. Facebook has defined a review process for the App. In the review process they make sure that you will be using their products (Facebook social provider) and data in an approved manner.
In general, this process involves specifying the type of data your app will be requesting from your customers and describing how you will use that data. And, based on your submission, they may follow up and ask you to provide additional information.
This document covers the step by step guide to get successful app approval for your configured app from Facebook. For additional information refer to the Facebook developers console guidelines page. You can read more about Facebook permissions here.
Gathering App Details
You need to gather few necessary details which will be required for submitting your App for review:
- Logo: 1024 x 1024 high-resolution image for your app.
- Details about the usage of each Permission: You need to provide brief details about why you require permission and how it is meant to be used.
- Video Walkthrough for each permission: Prepare a Video Walkthrough for each permission that you seek, showing how the permission is used in the app.
- Privacy Policy: An accessible website URL that hosts your privacy policy.
- Terms and service URL: A valid terms and service URL.
Things you need to provide for Status and Review
- General instructions on what your app does.
- Individual notes on each of the additional requested permissions as detailed below.
- Individual video walkthroughs to replicate functionality for additional requested permissions as detailed below.
- A version of your iOS or Android app:
- iOS Simulator Build or Apple Store ID listed in Settings.
- APK file or Android Package Name listed in Settings.
Additional Requested Permissions
In this section, you can see the details of the additional permissions that you can request in your app to get the data accordingly. Additional information on how these scopes correspond with LoginRadius data-points can be found here.
- publish_actions - Used when pushing data to Facebook through our API. Ex: Post status API.
- read_stream - Used for reading the posts in a person's feed.
- user_events - Used to retrieve a list of events that a user has subscribed to.
- user_groups - Used to retrieve a list of groups a user is a member of.
- user_likes - Used to access a list of all pages and objects that a user has liked.
- user_videos - Used to access the videos a user has uploaded or been tagged in.
- user_photos - Used to access the images a user has uploaded or been tagged in.
Note: Facebook requires that you have accepted permissions to publish_actions as well when requesting the user_photos API.
- user_tagged_places - Used to access the places a user has been tagged in.
- user_birthday - Used to access the date and month of a user’s birthday, it may or may not include the year depending on the users' privacy settings.
- user_age_range - Used to obtain the user's age range.
- user_hometown - Used to access the user's hometown.
- user_location - Used to access the user's current city.
- user_friends - Used to get a list of the user's friends that have also connected via your Facebook app.
- user_link - The link to the user's Facebook profile.
- user_gender - The user's gender.
Submitting your App for Review
This section covers the required configurations that you need to perform in the Facebook developer portal to submit your app for review:
Step 1: To submit your App for review login to Facebook developer portal and from My Apps button in the top right corner of the page (as shown in the below screenshot), choose the app that you wish to submit. This will take you to the app Admin-console.

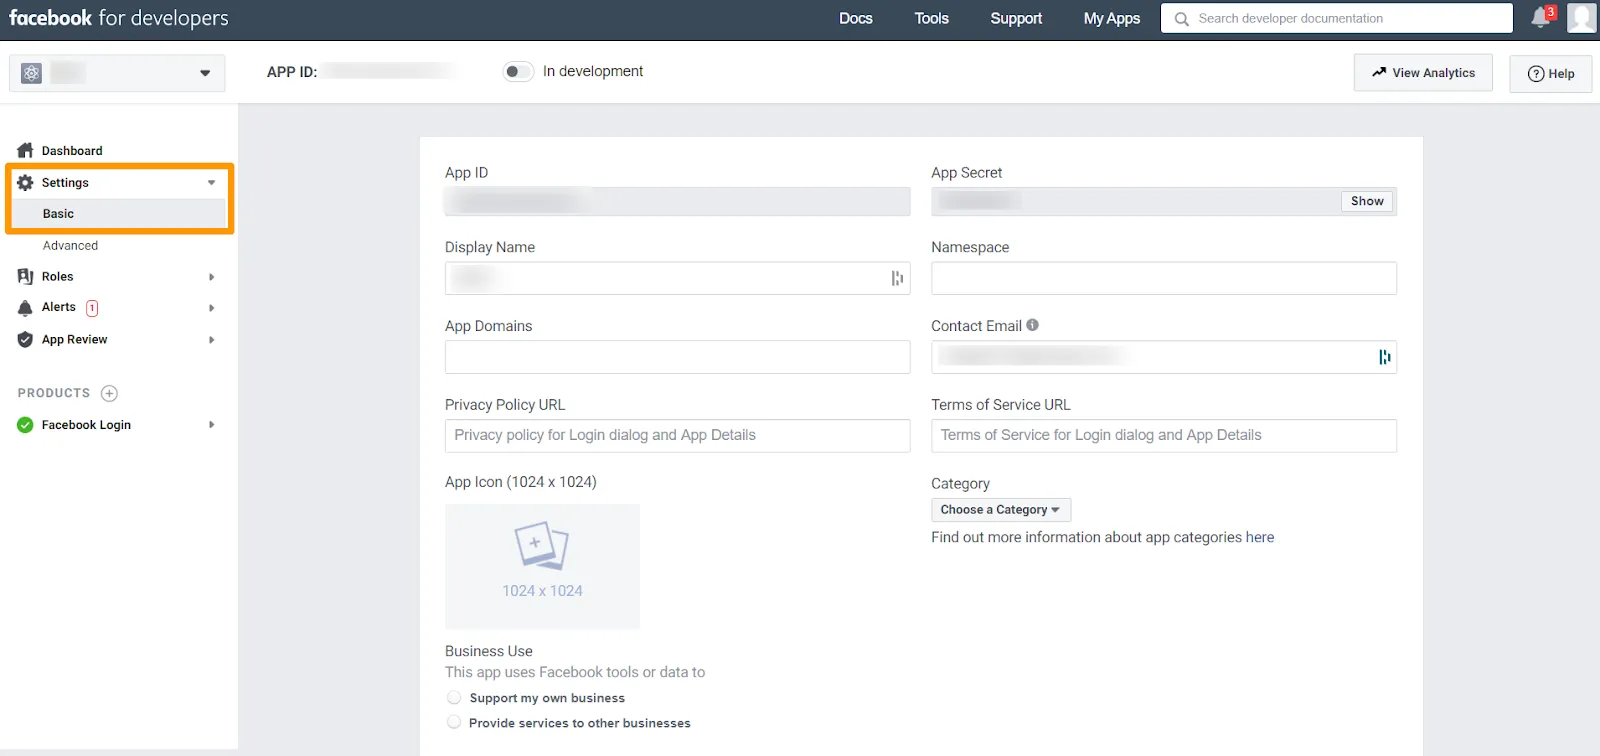
Step 2: From the Admin Console, Select Settings >Basic from the left menu. Here add a 1024 x 1024 logo, valid policy URL, valid terms and service URL, and select one of the Business Use options (shown in the below screen).
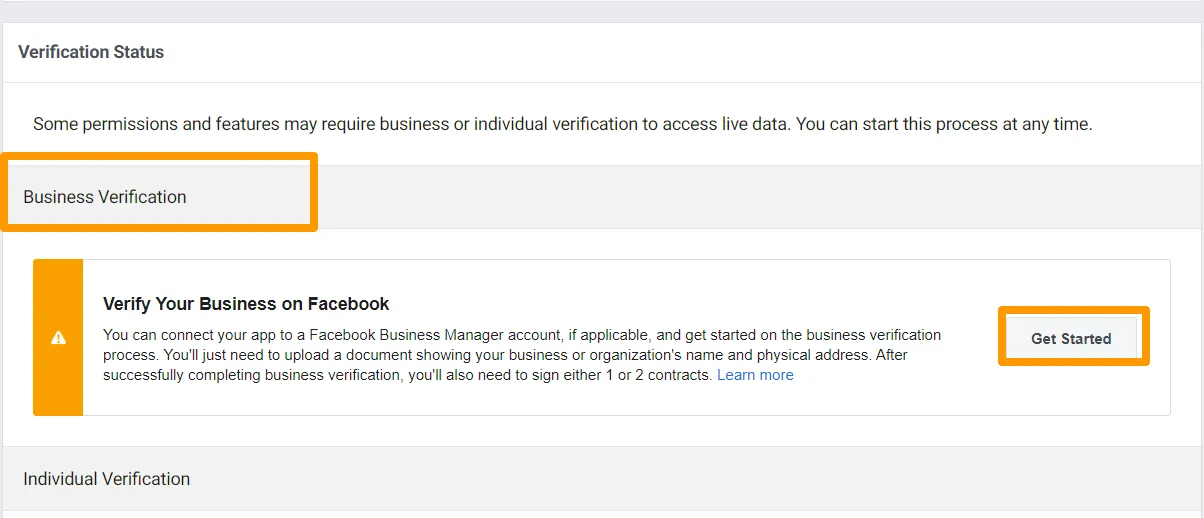
Step 3: For Business Verification, you need to verify your business also, click on the Get Started button as shown in the below screen.
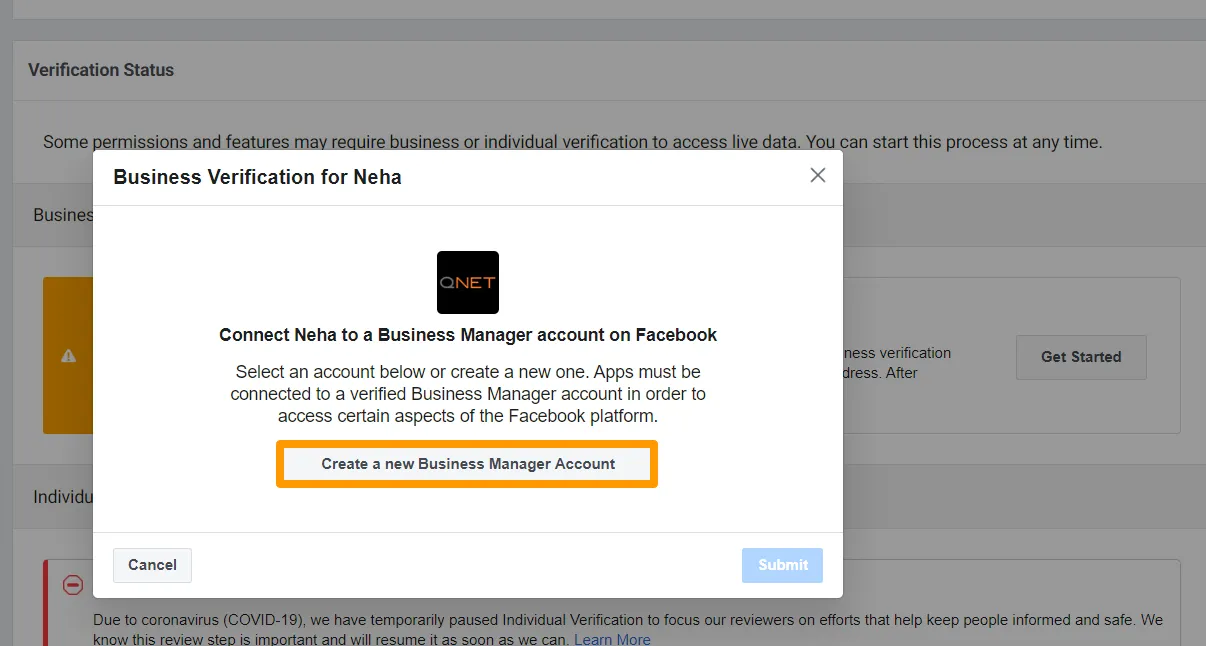
Step 4: If you haven't connected your app to a Facebook Business Manager account, then you are required to Create a Business Manager account.
The following screen will appear:
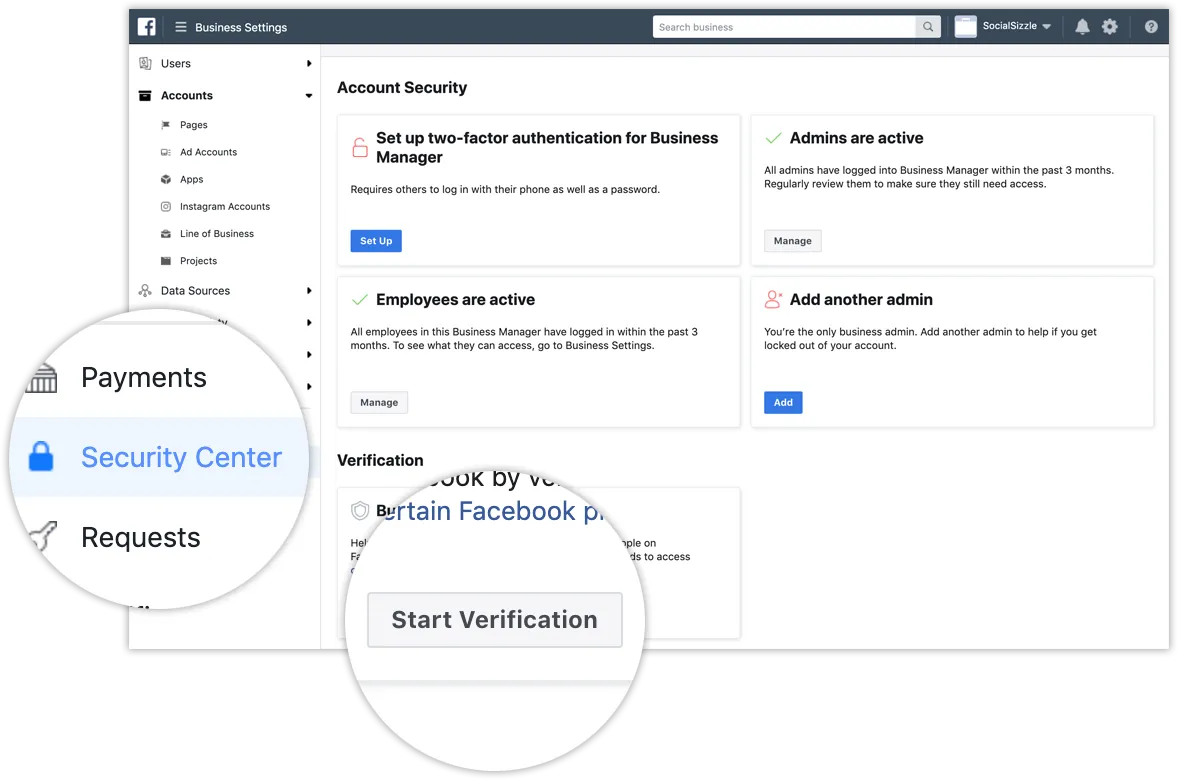
Step 5: After creating the business manager account and clicking the verification links or buttons , it will take you to the Business Manager's Business Settings > Business Info tab. From there, navigate to the Security Center and click Start Verification.
The following screen displays:
Note: If Facebook can locate your business details via their trusted 3rd party data sources, they will ask you to confirm your association with the business via email or phone. If they cannot locate your business details, you may need to submit additional documentation to complete the business verification process.
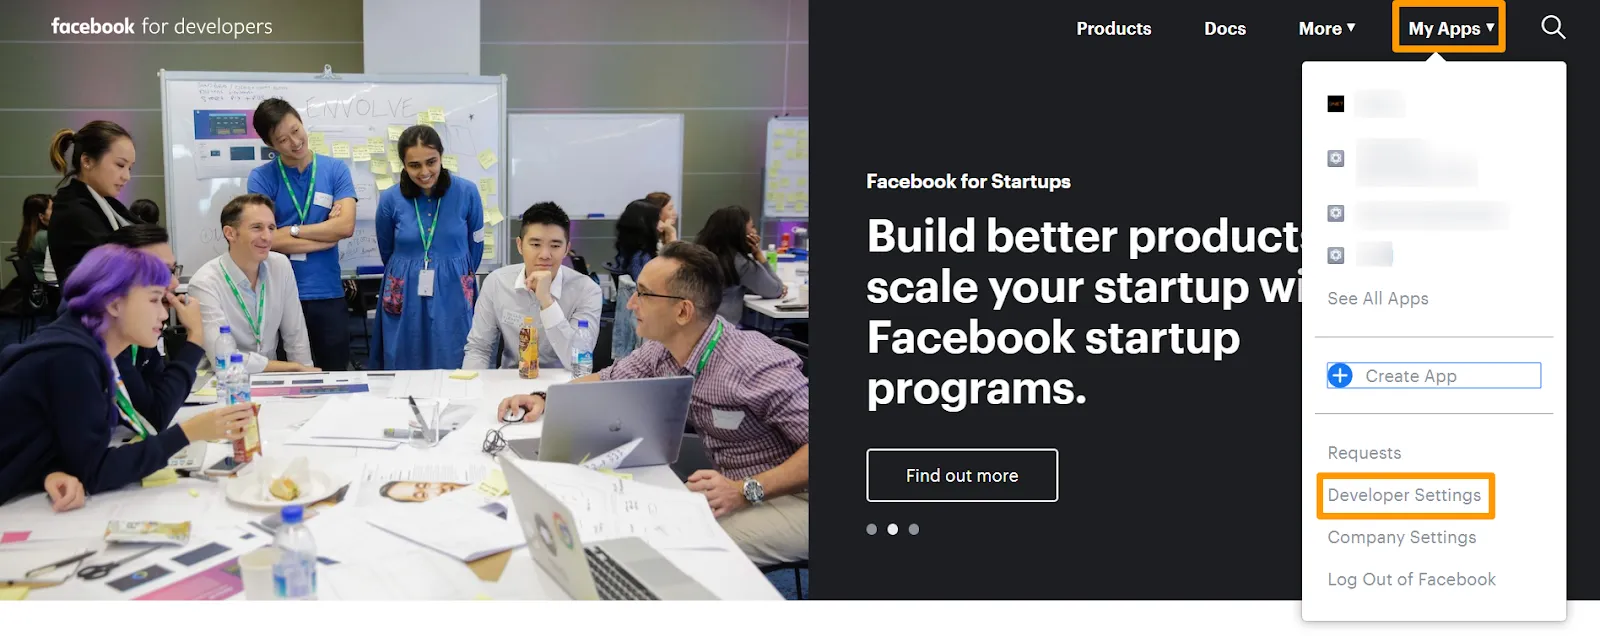
Step 6: For Individual Verification, go to the Facebook developer portal and click on My Apps and select Developer Settings as shown in the screen below:
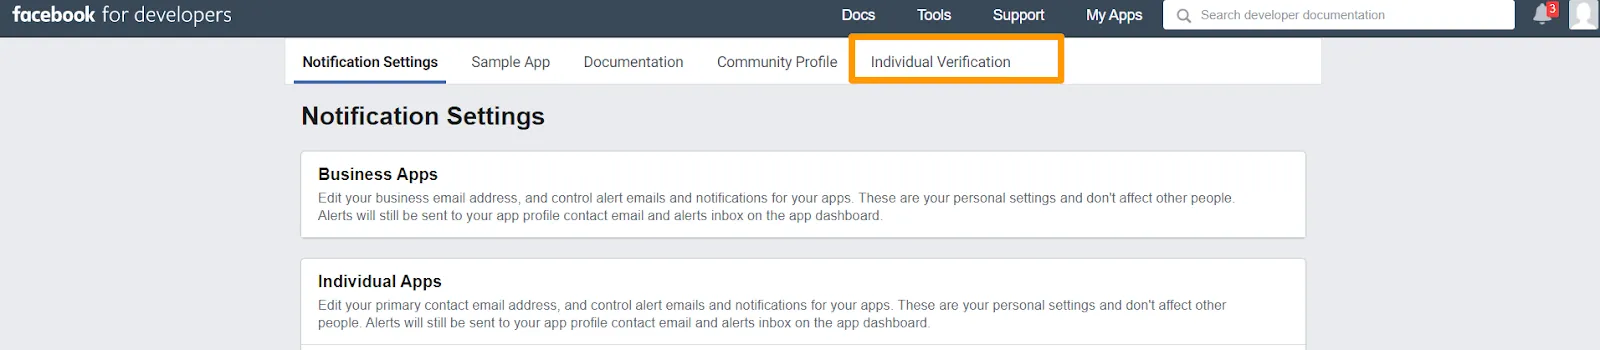
Step 7: Now, select the Individual verification tab as shown below and here you need to upload verified documents for individual verification.
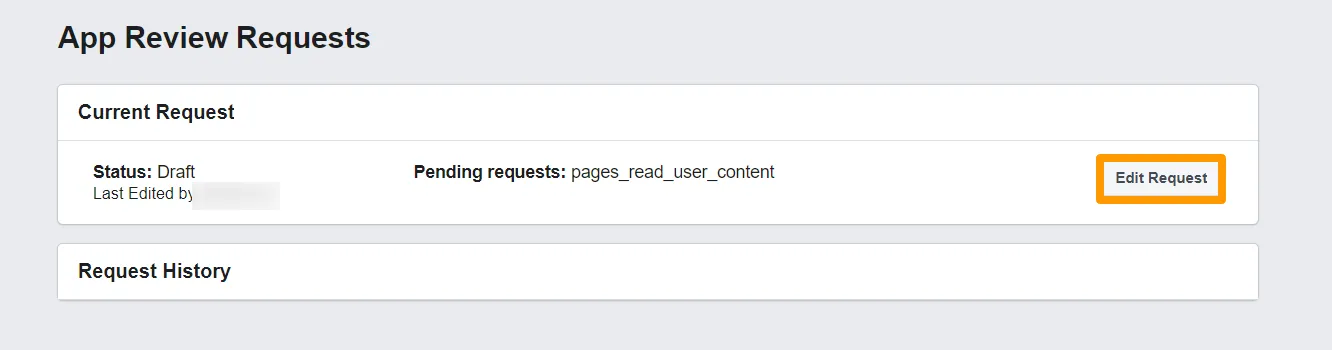
Step 8: After Business and Individual verification, go to App Review and select Permissions and Features. From here you can request the Facebook permissions that you want your app to have, click on Request to request any permissions. You can edit your App Review request by clicking on the Edit Request button.
The following screen displays the Edit Request option:
Note: Refer to the Facebook Permissions document for all the Facebook permissions that you can choose from. Some permissions require business verification and/or additional contract signing.
Step 9: From here you can update your request and the following screen will appear:
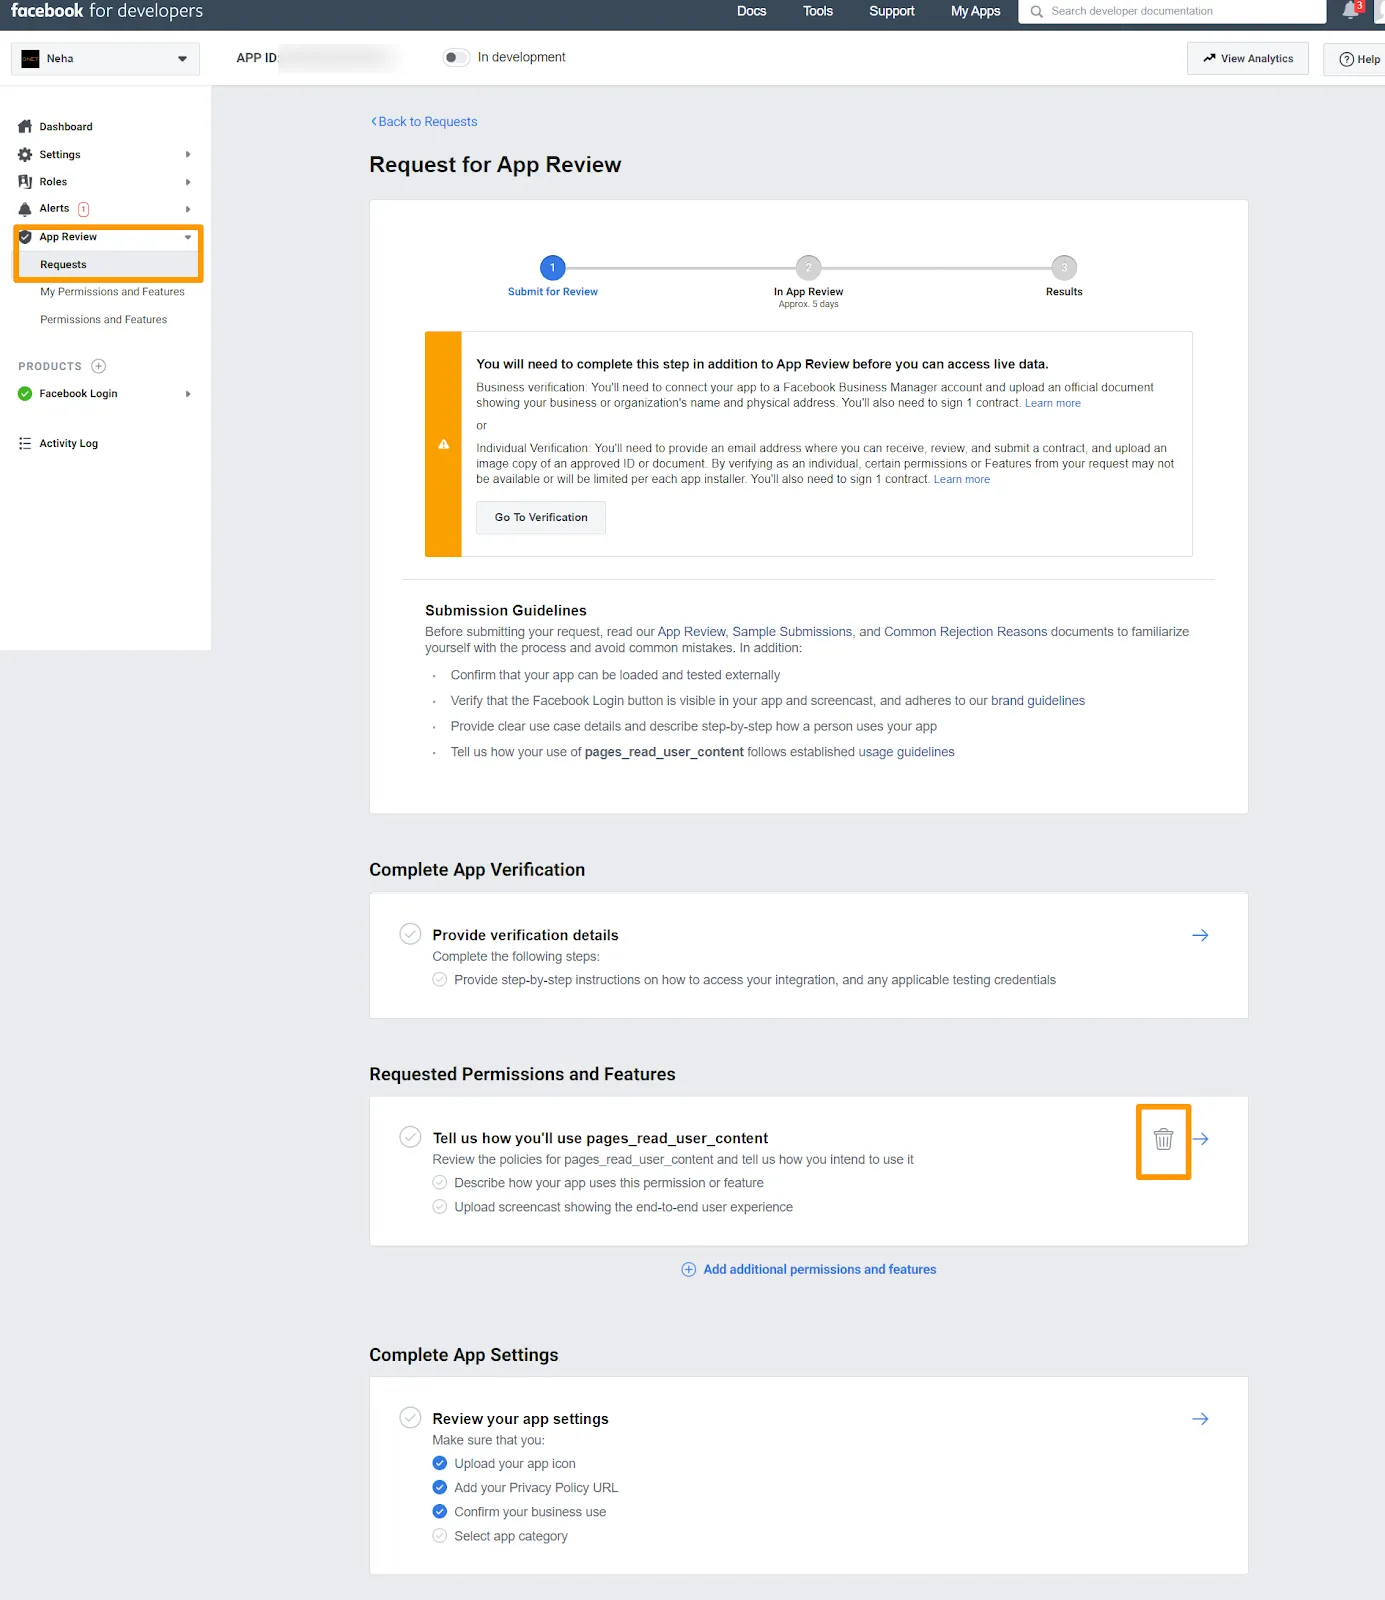
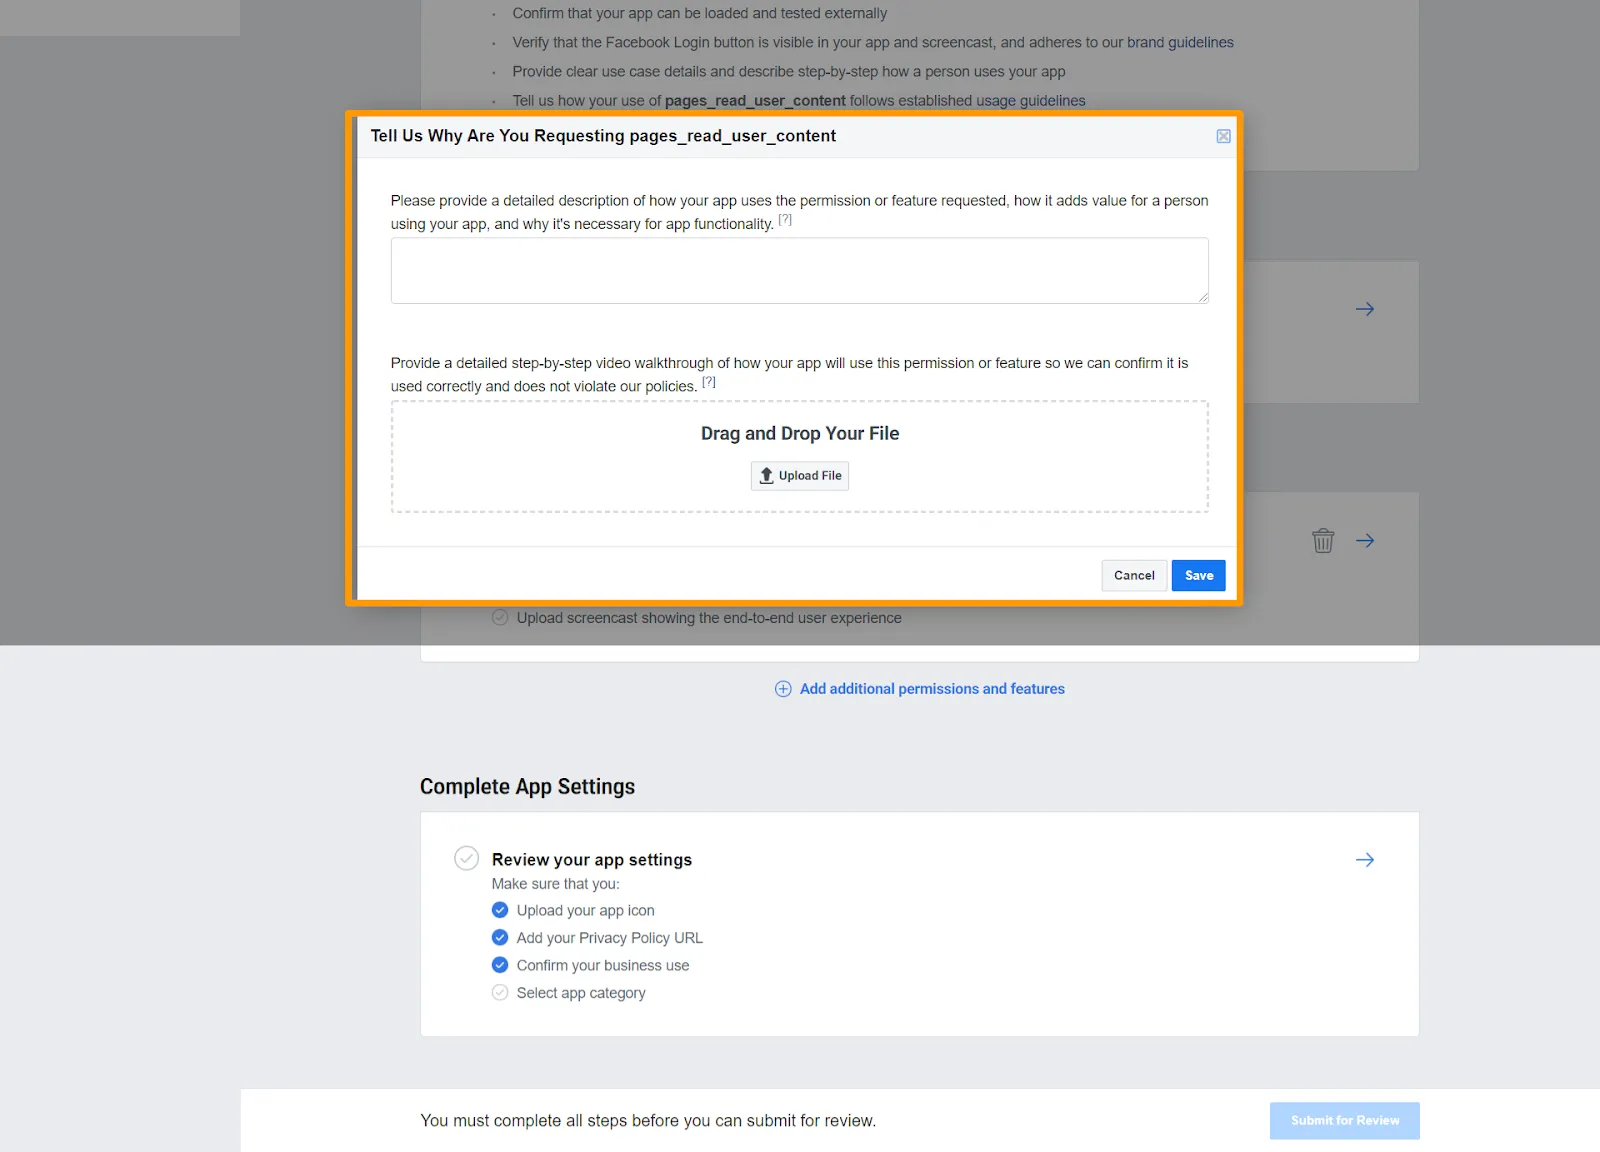
Step 10: For completing the verifications click the "→" button and complete the form one by one. For example, Facebook permission here, you will need to submit a detailed description and a video walkthrough. Certain permissions may require more questions within the form. Click Save after completing the form. Repeat this step for each permission.
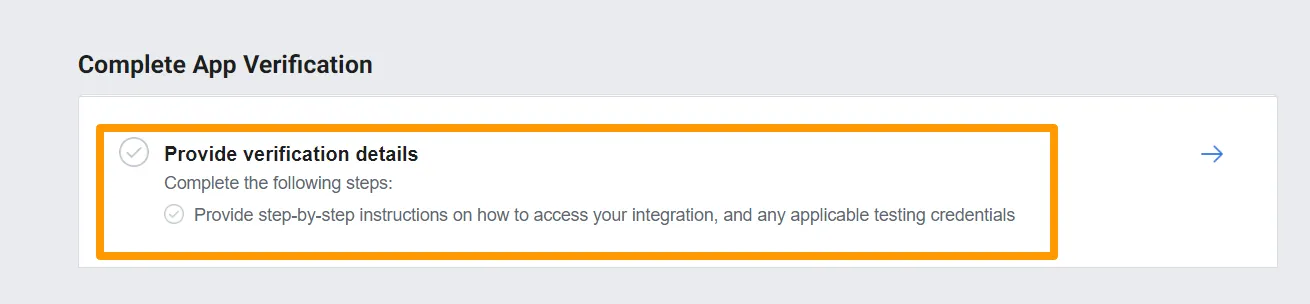
Step 11: Now go to the Complete App Verification section on the same Request page. Click on Provide Verification Details as shown in the below screenshot.
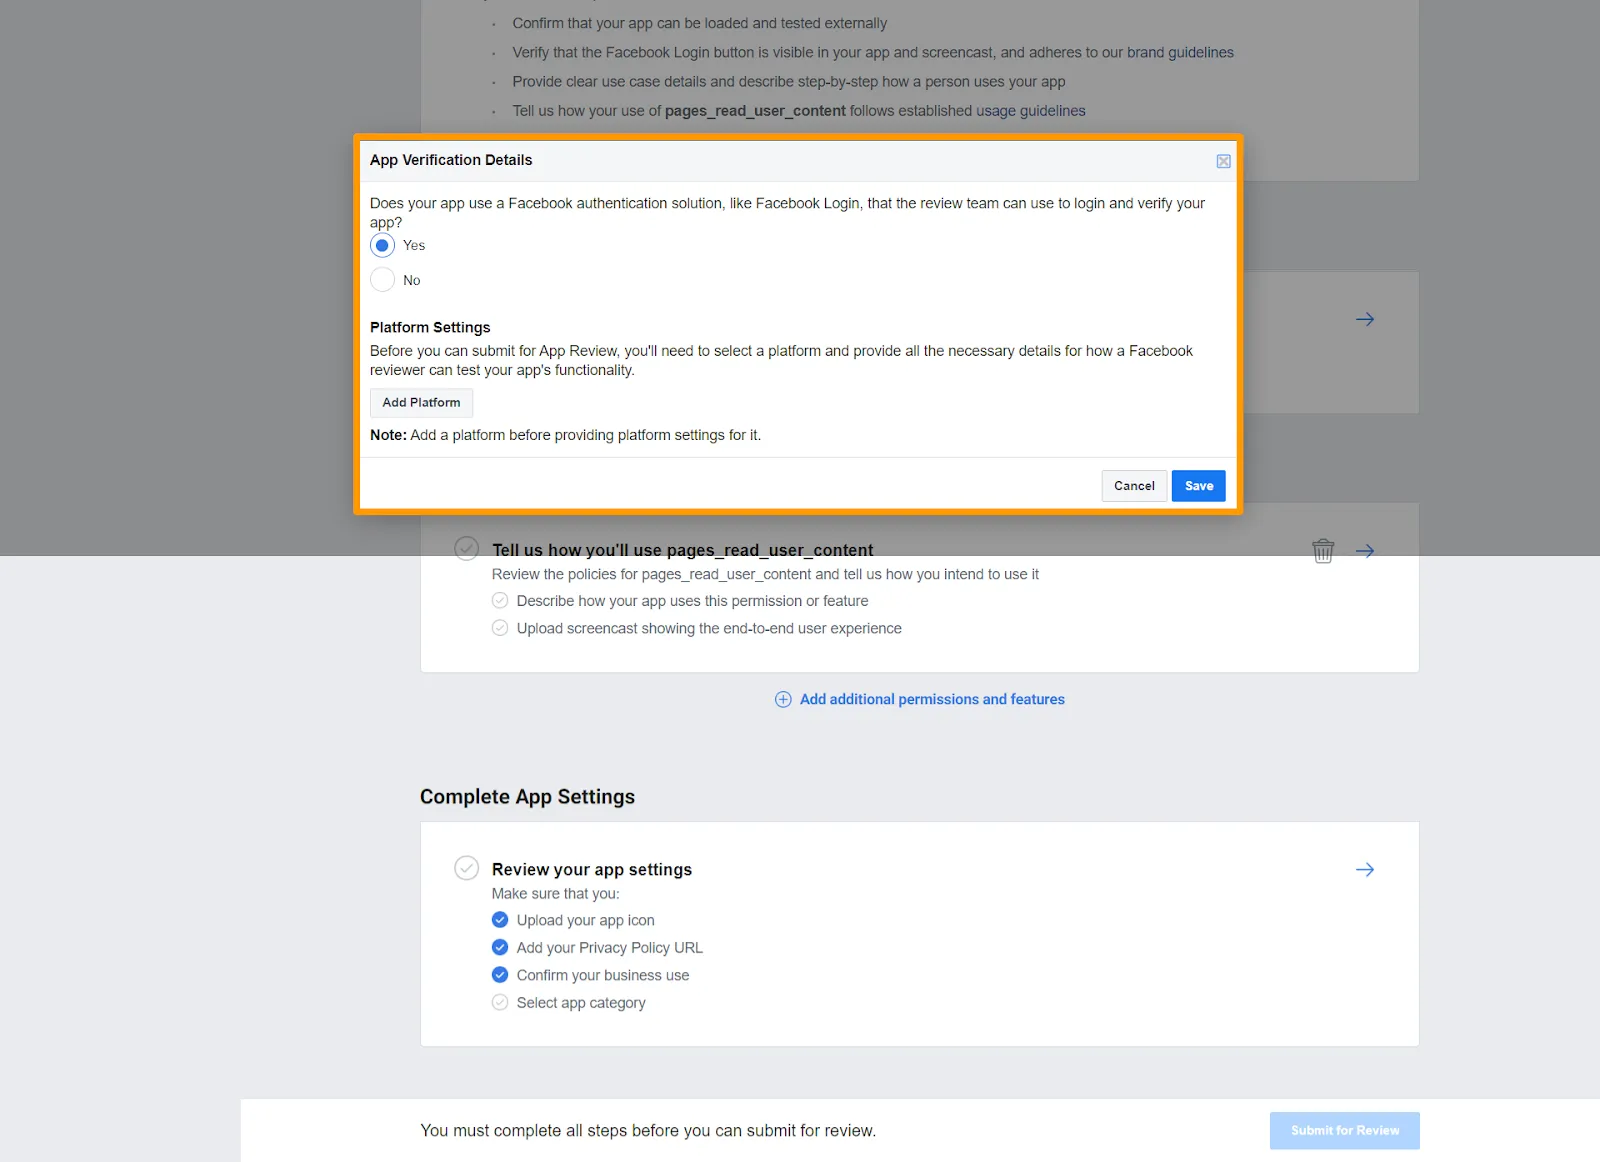
Step 12: Provide the required information here to Complete the App Verification Details form.
Step 13: Click on the Submit for Review button to submit the app for review.
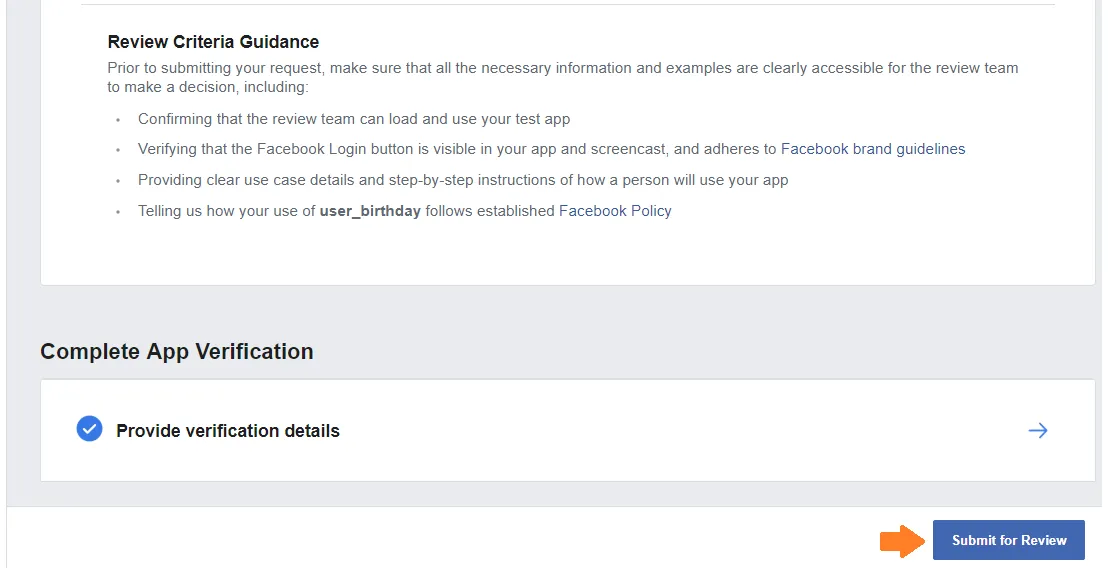
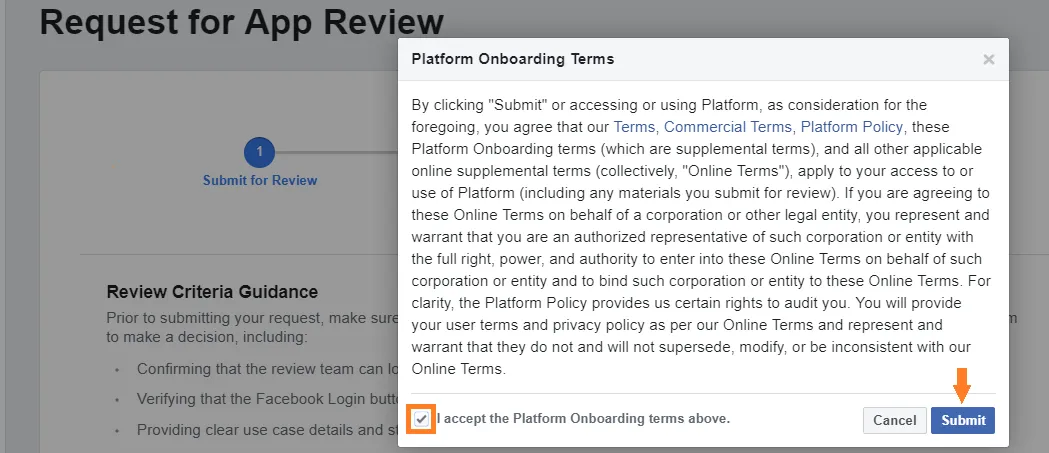
Step 14: Accept the terms and then click on the Submit button. You will be able to review your App Review Status at App Review > Requests.
Next Step
The following is the list of features you might want to add-on to the above implementation: