Intercom
Intercom’s platform lets businesses track and filter customer data. This data includes conversation history, product usage behavior, past purchases, payment details, etc. Businesses can use these attributes to trigger personalized, automated marketing emails and in-app messages. Intercom lets businesses create and send targeted in-app messages to customers while they’re logged into their app.
All of the features above are done by the Intercom JavaScript code and it would be a very good practice for LoginRadius users to combine it with the LoginRadius analytics tracking code. A major benefit of doing this would be the feature of automatically tracking events (social and traditional).
- The basic implementation takes a couple of minutes.
Note: Before you go any further, make sure your Intercom has been activated.
Implementation
You will first need the following JavaScript files (you may have some of them already, make sure the order of the scripts is correct).
Deploy the LoginRadius V2 JS
<script src="https://auth.lrcontent.com/v2/js/LoginRadiusV2.js"></script>
Deploy the LoginRadius V2 Integration JS
<script src="https://auth.lrcontent.com/v2/js/LoginRadiusV2.Integrations.js"></script>
Intercom JS Code
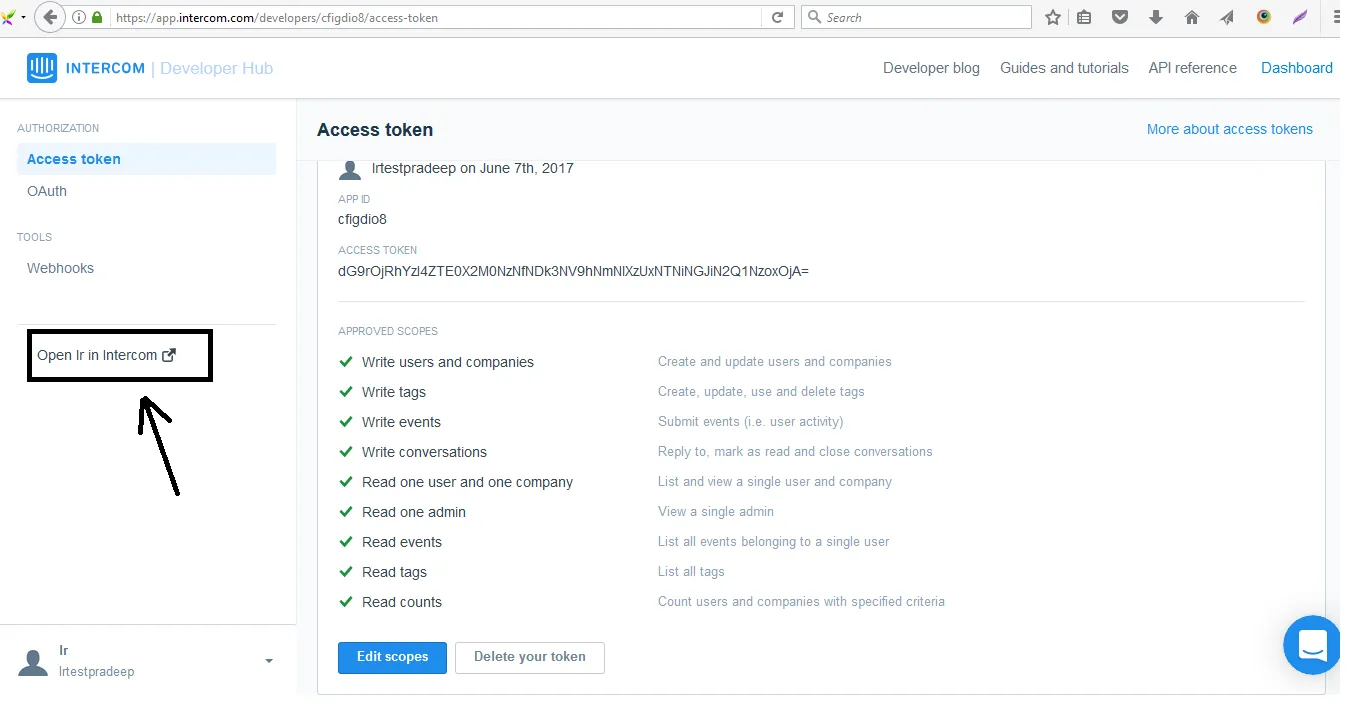
Start with Intercom from here.
In this page, go to Step 1: Install Intercom JS Library. Copy and paste given snippet.
If you are using PHP as your back-end language, it is recommended to put the script in a separate file, and include it in the page you want to track.
Identifying Users
With intercom, the way to identify a user is via a User Profile.
- Call our identify function to link the account
LRObject.identify("intercom",response.Profile,mapping)
- The specifics on how to use this is in the Getting Started
<script>
     var mapping={
     standard:[
       "email",
       "firstname"
     ],
     custom:{
       intercom:{
         mappings:{
         "Email[0].Value":"Custom-Field"
          },
         ignoreDefault:true // ignores standard, only does the mappings
       }
     }
   };
    var commonOptions = {};
    commonOptions.apiKey = 'xxxxxxxxxxxxxxxxxxxxxxxxxxxx';
    commonOptions.appName = 'XXXXX';
    var  LRObject = new LoginRadiusV2(commonOptions);
    var login_options = {};
    login_options.onSuccess = function(response) {
    //On Success
    // Use to sync data in your intercom integration.
    LRObject.identify("intercom",response.Profile,mapping)
    console.log(response);
    };
    login_options.onError = function(errors) {
    //On Errors
    console.log(errors);
    };
    login_options.container = "login-container";
    LRObject.util.ready(function() {
    LRObject.init("login",login_options);
    });
</script>
Custom Mapping
If you're using a custom mapping (isCustom == true), the data object needs to be a JSON formatted object for the specified key-values you want to place into an account. Example:
<script>
    var data = {
        "Registered at": "Site A",
        "Platform Logged In On": "Mobile"
    }
    var commonOptions = {};
    commonOptions.apiKey = 'xxxxxxxxxxxxxxxxxxxxxxxxxxxx';
    commonOptions.appName = 'XXXXX';
    var  LRObject = new LoginRadiusV2(commonOptions);
    var login_options = {};
    login_options.onSuccess = function(response) {
    //On Success
    // Use to sync data in your intercom integration.
    LRObject.identify("intercom",data,'', true)
    console.log(response);
    };
    login_options.onError = function(errors) {
    //On Errors
    console.log(errors);
    };
    login_options.container = "login-container";
    LRObject.util.ready(function() {
    LRObject.init("login",login_options);
    });
</script>
Note: The following tracking will work with identifying because of intercom tracks events on basis of user.
Implement basic tracking
LoginRadius Tracking Setting Script
<script>
    var commonOptions = {};
    commonOptions.apiKey = 'xxxxxxxxxxxxxxxxxxxxxxxxxxxx';
    commonOptions.appName = 'XXXXX';
    var  LRObject = new LoginRadiusV2(commonOptions);
    //In order to task all events (tradtional and Social)
    LRObject.track('intercom');
    var login_options = {};
    login_options.onSuccess = function(response) {
    //On Success
    console.log(response);
    };
    login_options.onError = function(errors) {
    //On Errors
    console.log(errors);
    };
    login_options.container = "login-container";
    LRObject.util.ready(function() {
    LRObject.init("login",login_options);
    });
</script>
Tracking Setting
Track all events (social and Traditional)
<script>
    LRObject.track('intercom');
</script>
Filtered Tracking Setting
If you want to track the behavior when specific event fired then use the following code:
- Single Event:
<script>
    LRObject.track('intercom', eventName); //eventName = ['login']
</script>
Multiple event:
<script>
    LRObject.track('intercom', eventName); //eventName = ['login', 'registration']
</script>
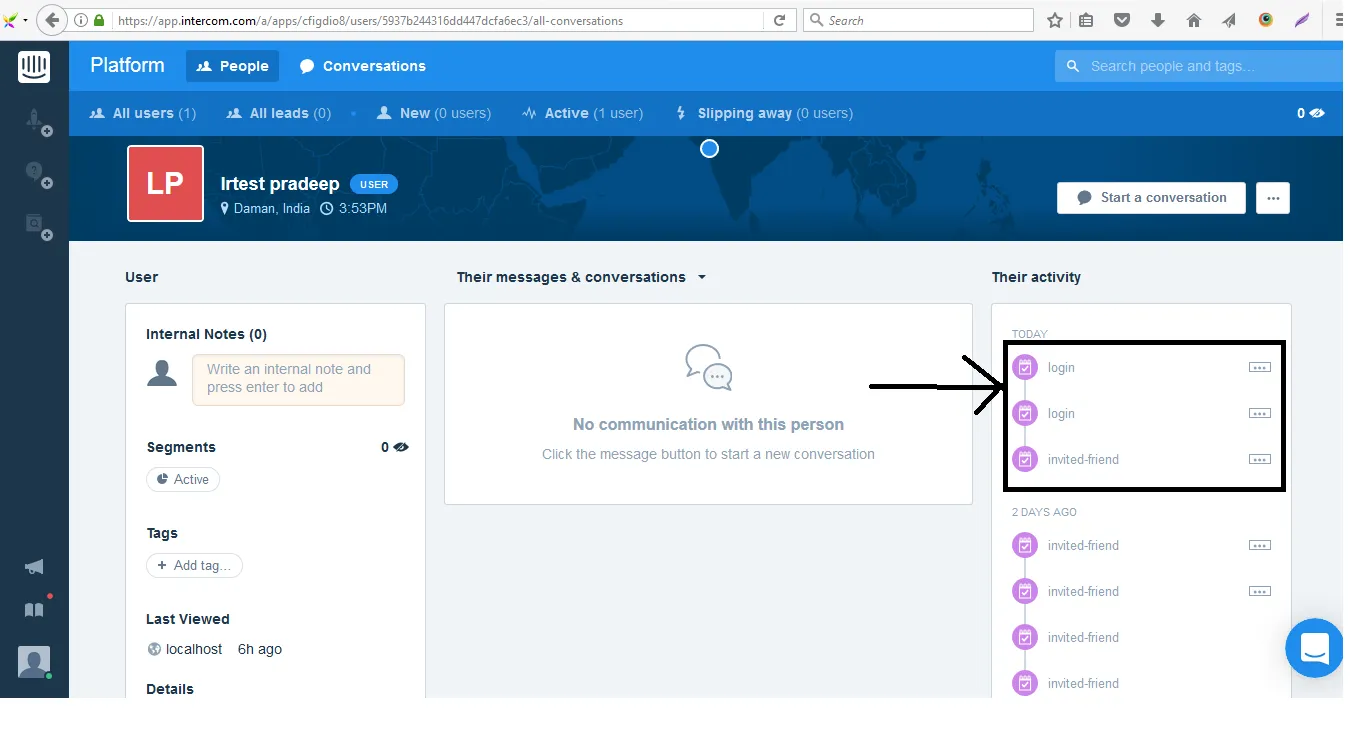
View the data in Intercom
Make sure every JavaScript file is put in the correct order.
Click on any event (social and traditional) from your LoginRadius interface, and it will send an event to your Intercom Admin-console.
- View the data and information.
To check Live View in Intercom
- Navigate to Intercom Admin Console
General Events Monitoring
- Open intercom app by clicking on app name in the left panel in above Admin-console.
- Click on username to see events.