Authentication and user identity management are challenging tasks you are bound to run into when building applications. For example, you will need to create profiles for users, validate provided passwords, implement a password reset functionalities, manage user sessions (sometimes on multiple devices), manage social media authentication, and many others.
You still have to work on other parts of your application, and you might not have a lot of time. A lot of developers might hack their way through authentication, but that could lead to improper implementations. It is not advisable to do this as you can create doorways for cyber-related attacks in your application.
In this tutorial, you will learn how to properly implement user authentication and identity management in a Flask application.
Here for the code alone? Head over to the implementation section of this article or visit this GitHub gist to browse demo code.
Introduction
What Is User Authentication?
User authentication is the process of validating a person’s identity to ascertain that they are who they claim to be. Authentication is achievable using passwords, one-time pins (OTP), biometrics, authentication apps, access tokens, certificates, and many more.
What Is User Identity?
User identity is an entity used to identify a user of an application uniquely. Forms of user identifiers include full names, email addresses, system-generated values, and UUIDs.
What Is an Identity Provider?
An identity provider is a system that helps create, maintain, and manage user identity information. It also provides authentication services to external applications to ease their authentication flow and make it seamless.
What Is Authentication in Python?
When referring to authentication in Python, we talk about user authentication concerning web applications built with it. Python is actively used in making web applications with many supporting frameworks, including but not limited to Flask, Django, FastAPI, Bottle, and Hug.
Every web application built with Python at one point or another would need to implement user authentication features. This article will cover implementing authentication and proper handling of user identity information using LoginRadius and Flask.
Getting Started with LoginRadius
What Is LoginRadius?
LoginRadius is a cloud-based consumer identity and access management (CIAM) platform that allows seamless user authentication and SSO integration into your application. LoginRadius is simple to use, completely secure, and highly customizable.
To proceed with this tutorial, you will need an account with LoginRadius. If you have not created one before now, create one on the LoginRadius website.
Benefits of Using LoginRadius
- It simplifies user management.
- It provides unmatched data, user, and account security.
- It ensures automatic privacy compliance.
- It integrates seamlessly into your applications.
- It provides scalable infrastructure.
- This section covers setting up the demo application that we will be integrating LoginRadius into in the remaining parts of the tutorial.
- It also covers LoginRadius integration with the Python and Flask demo application code.
Acquiring LoginRadius API Credentials
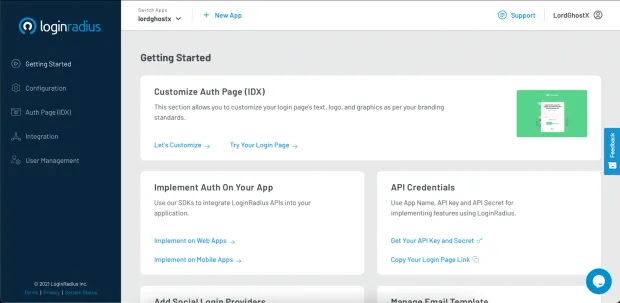
Login to your LoginRadius dashboard, then navigate to the app you want to integrate with Python (LoginRadius will set up a free app for you when you create an account).
Next, head over to the Configuration tab on the LoginRadius sidebar (left side of the screen).
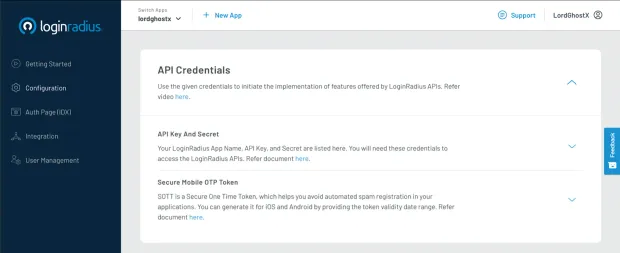
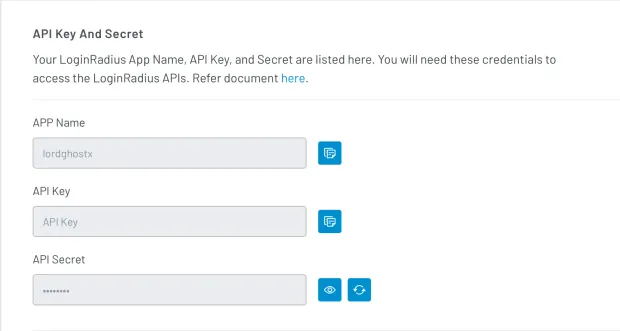
Your API credentials are located under the API Key And Secret section. Once you have retrieved this, copy the APP Name, API Key, and API Secret and store them somewhere secure and easily retrievable.
Whitelisting Your Domains
LoginRadius requires you to whitelist domains you will be integrating with your app. To whitelist, a domain, scroll down to the Whitelist Your Domain section in the Configuration tab of your app dashboard and add it.
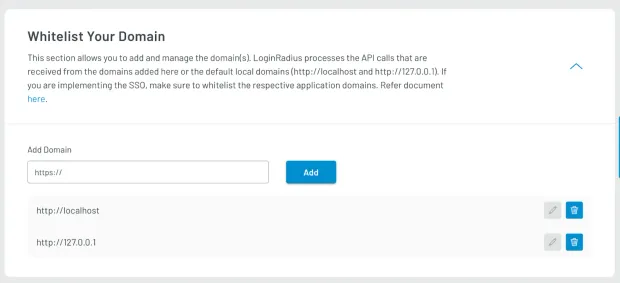
By default, LoginRadius whitelists your local computer (localhost).
Installing LoginRadius Python SDK
We need to install the LoginRadius Python SDK. It provides functionalities that allow Python programs to communicate with LoginRadius APIs.
In the terminal, type:
1pip install LoginRadius-v2 requests cryptography pbkdf2Setting up Our Flask Server
First, we need to install the Flask framework from PyPI. In the terminal, type:
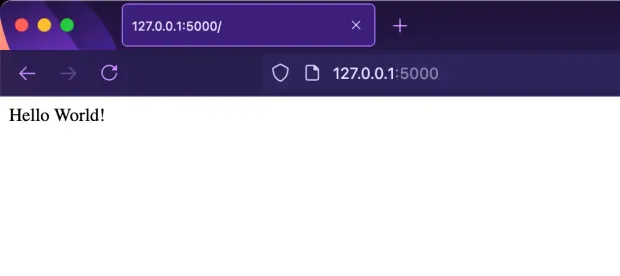
1pip install flaskAfter that, create a file named server.py and save the following code in it:
1from flask import *
2app = Flask(name)
3app.config["SECRET_KEY"] = "SECRET_KEY"
4@app.route("/")
5def index():
6return "Hello World!"
7if name == "main":
8app.run(debug=True)
When you run the server.py script and open your browser, you will get a response similar to the image below:
Initializing the LoginRadius SDK
Update the server.py file with the code below:
1from LoginRadius import LoginRadius as LR
2LR.API_KEY = "API Key"
3LR.API_SECRET = "API Secret"
4loginradius = LR()
Replace the values of the API_KEY and API_SECRET variables with your LoginRadius application keys we saved earlier.
Setting up User Registration
To register users, you have to redirect them from your application to your LoginRadius Auth Page (IDX). Each LoginRadius app has a custom IDX. You can access it with the following URL pattern.
1https://{APP_NAME}.hub.loginradius.com/auth.aspx?action={AUTH_ACTION}&return_url={RETURN_URL}- The
APP_NAMEparameter refers to your LoginRadius app name, which you can retrieve from theAPI Key And Secretsection in theConfigurationtab of your dashboard. - The
AUTH_ACTIONparameter refers to the authentication action you’re attempting to perform. It is eitherregisterorlogin. - The
RETURN_URLparameter refers to the URL LoginRadius should redirect your users to after successful authentication. It is usually a route on your application server.
Update the server.py file with the code below:
1LR_AUTH_PAGE = "https://<APP_NAME>.hub.loginradius.com/auth.aspx?action={}&return_url={}"
2@app.route("/register/")
3def register():
4## redirect the user to our LoginRadius register URL
5return redirect(LR_AUTH_PAGE.format("register", request.host_url))
In the code above, we created a register route that redirects users to our LoginRadius registration IDX. We also set our AUTH_ACTION to “register” and our RETURN_URL to our application home page.
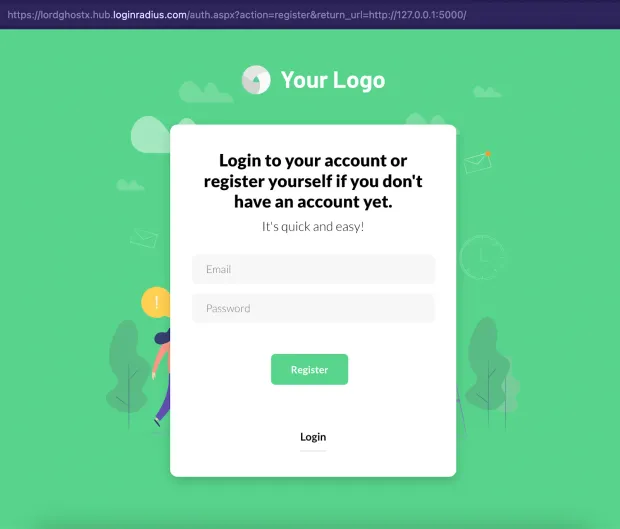
NOTE: Don’t forget to replace the <APP_NAME> placeholder with your LoginRadius app name we saved earlier.
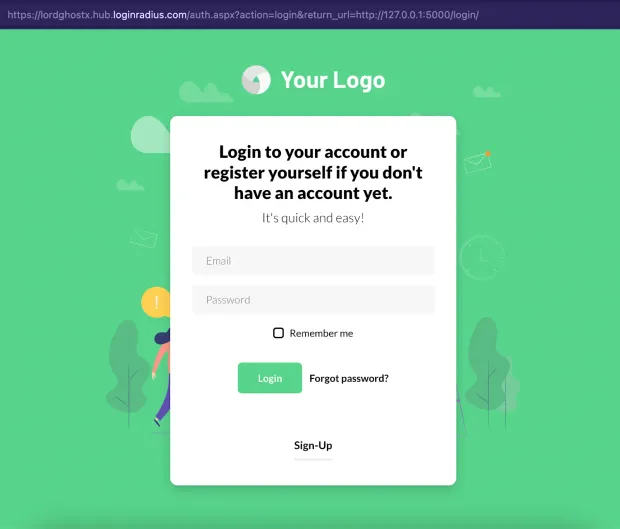
Authenticating Registered Users (User Login)
To authenticate registered users, you have to redirect them to your IDX page, passing “login” as the AUTH_ACTION.
Update the server.py file with the code below:
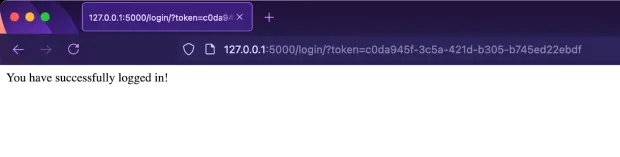
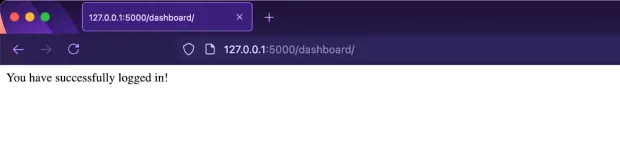
1@app.route("/login/")
2def login():
3    access_token = request.args.get("token")
4    if access_token is None:
5        ## redirect the user to our LoginRadius login URL if no access token is provided
6        return redirect(LR_AUTH_PAGE.format("login", request.base_url))
7return "You have successfully logged in!"
When LoginRadius successfully authenticates a user, it attaches a
tokenparameter to theREDIRECT_URLbefore redirecting your user there. This parameter contains the access token of the user that we authenticated.
In the code above, we redirect users to our LoginRadius login IDX if the token parameter is absent (this means LoginRadius did not redirect the user here). We also set our AUTH_ACTION to “login” and our RETURN_URL to our login page.
Fetching User Profiles From Access Tokens
We also want to fetch user profiles from the access token given by LoginRadius. It comes in handy when we want to verify if a given access token is valid (or has expired) or just fetch information about the current user.
Update the login route with the code below. We also added a dashboard route where we will redirect users after successful authentication.
1@app.route("/login/")
2def login():
3    access_token = request.args.get("token")
4    if access_token is None:
5        ## redirect the user to our LoginRadius login URL if no access token is provided
6        return redirect(LR_AUTH_PAGE.format("login", request.base_url))
7## fetch the user profile details with their access tokens
8result = loginradius.authentication.get_profile_by_access_token(
9    access_token)
10
11if result.get("ErrorCode") is not None:
12    ## redirect the user to our login URL if there was an error
13    return redirect(url_for("login"))
14
15session["user_acccess_token"] = access_token
16
17return redirect(url_for("dashboard"))
18
19@app.route("/dashboard/")
20def dashboard():
21return "You have successfully logged in!"
In the code above, we used the authentication.get_profile_by_access_token method from the LoginRadius SDK to fetch our user’s details. If the request was successful and the result does not contain an ErrorCode parameter, we save the access token in the user’s session and redirect them to the dashboard route. But if an error occurs somewhere, e.g., the access token is invalid/expired, we redirect the user back to the login route.
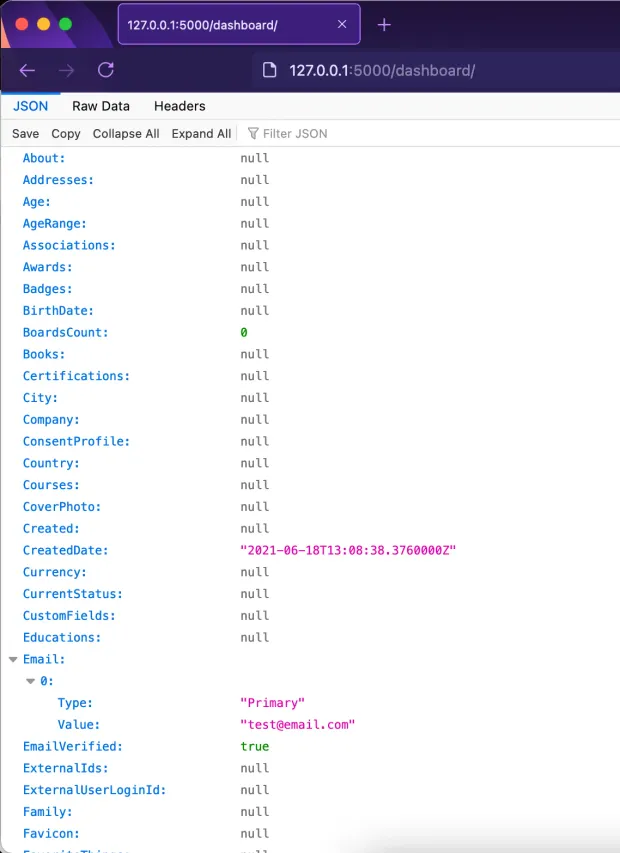
Next, we want to add more functionality to the dashboard route. Instead of just displaying a dummy text, let it show the user information we fetched earlier. Update the dashboard route with the code below:
1@app.route("/dashboard/")
2def dashboard():
3    access_token = session.get("user_acccess_token")
4    if access_token is None:
5        return redirect(url_for("login"))
6## fetch the user profile details with their access tokens
7result = loginradius.authentication.get_profile_by_access_token(
8    access_token)
9
10if result.get("ErrorCode") is not None:
11    ## redirect the user to our login URL if there was an error
12    return redirect(url_for("login"))
13
14return jsonify(result)
Here, we fetched the access token stored in the user’s session earlier, used it to get their details, and rendered the result.
Invalidating Access Tokens (User Logout)
Invalidating access tokens means rendering particular access tokens useless and unusable. It comes in handy when we log out users. The LoginRadius SDK provides an auth_in_validate_access_token method that takes in an access token to be invalidated.
To add this to our server, create a logout route with the code below:
1@app.route("/logout/")
2def logout():
3    access_token = session.get("user_acccess_token")
4    if access_token is None:
5        return redirect(url_for("login"))
6## invalidate the access token with LoginRadius API
7loginradius.authentication.auth_in_validate_access_token(access_token)
8session.clear()
9
10return "You have successfully logged out!"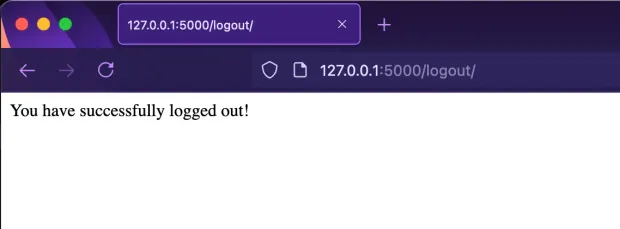
Conclusion
This article taught us about user authentication, user identity management, and implementing it correctly. In addition, we saw how easy it is to integrate LoginRadius services into a Python application to ease the implementation of authentication and user identity management.
The source code of the demo application is available as a GitHub gist. You can learn more about the LoginRadius Python SDK features from the official documentation.


