Hey Everyone !!! This blog will walk you through the steps necessary to quickly implement authentication mechanisms for your React application by leveraging LoginRadius and the LoginRadius CLI with the help of examples.
Using the LoginRadius CLI, you can perform basic actions of your LoginRadius Dashboard through the command line. The actions include login, register, logout, social configuration, domain whitelisting, site management, etc. Once the actions are performed, changes will be reflected in your application.
Configuring LoginRadius
Please follow the steps below to install the LoginRadius CLI on your system. Once completed, use the CLI to finish registration on the LoginRadius portal and create your application.
LoginRadius CLI Setup
Mac or Linux
-
Install the tap using:
1$ brew tap loginradius/tap -
Then, you can install LR CLI via:
1$ brew install lr
Other Platforms
- Packaged binaries are available on the release page.
Once you have the CLI installed, the following command can be used to complete the registration process via the LoginRadius portal.
1$ lr registerThis command will open the Portal in the browser, where you can register yourself and create the app.
If you already have a LoginRadius account, use the command below to directly login :
1$ lr loginOnce you successfully register or login, the below message will be visible in a new tab on the browser. Close the tab and return to the CLI.
1You are Successfully Authenticated, Kindly Close this browser window and go back to CLI.If your account has multiple sites (for Developer/Developer Pro Plans), an option will be given to choose the site that you wish to login with. You can choose a site according to your preference.
1$ lr login
2  Successfully Authenticated, Fetching Your Site(s)...
3? Current Site is: <value>, Want to Switch? Yes
4? Select the site from the list: <value>
5  Site has been updated.
6  Successfully Logged In
Fetching Application API Credentials
Once the login/register process has been completed, run the lr get config command to fetch your API Key/Secret as shown below.

Configuring Callback URLs
Here, a callback URL refers to a URL in your application that LoginRadius would redirect a user to after they have been authenticated. These URLs must be added to your Application Configuration. If not set, users will be unable to login into the application and receive an error.
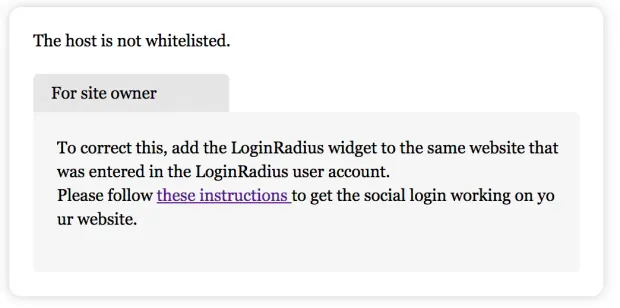
For security reasons, LoginRadius only processes API calls that are received from the whitelisted domains. To get the list of whitelisted domains, run lr get domain command from the CLI. Similarly, to add a domain, use the lr add domain command.
For the purposes of this tutorial, make sure that you set
http://localhostas a whitelisted domain.

Setup React JS application
This tutorial uses a demo app based on the Create React App (CRA) boilerplate. For instructions on how to create a React App, refer to the following docs.
The React Demo Application mentioned here will display the User Profile data if the login process is completed successfully.
After setting up the boilerplate:
-
From the project root, install
react-router-dom.npm install react-router-dom -
Create
src/config.jsand add the application details in the code as shown below.
1const config = {
2    APP_NAME: '<<App Name>>',
3    API_KEY: '<<API Key>>',
4  };
5  export default config;
This tutorial uses LoginRadius Auth Page(IDX) for authentication, where Registration and Login functionality is already implemented. For example, you can navigate your Register buttons to
https://<LoginRadius APP Name>.hub.loginradius.com/auth.aspx?action=register&return_url=<Return URL>.
Add Code to your Application
- For this demo, we will start by populating the
App.jsfile as shown below. Notice that the/loginroute has been added to the App component in which theLoginandLogoutcomponents are rendered. They will be used to get the user profile data and handle user logout, respectively. The/route will load theLandingPagecomponent. If you already have an existing React application, you can specify the route for these components as per your requirements.
1import { BrowserRouter as Router, Route, Switch } from "react-router-dom";
2import "./App.css";
3import LandingPage from "./components/LandingPage";
4import Login from "./components/Login";
5import Logout from "./components/Logout";
6function App() {
7return (
8<Router>
9<div className="App">
10<Switch>
11<Route exact path="/">
12<LandingPage />
13</Route>
14<Route path="/login">
15<div style={{ display: "flex", padding: "1em" }}>
16<Login />
17<Logout />
18</div>
19</Route>
20</Switch>
21</div>
22</Router>
23);
24}
25export default App;
Add Landing Page
In your components folder under the src folder, create a src/components/LandingPage.js file and add the following code to navigate your Register/Login buttons to the following URL's as shown below.
1import React from "react";
2import config from "../config.js";
3const LandingPage = () => {
4 return (
5 <div>
6 <h1> React Demo App </h1>
7 <a
8 href={`https://${config.APP_NAME}.hub.loginradius.com/auth.aspx?action=register&return_url=${window.location.origin}/login`}
9 >
10 <button>Register</button>
11 </a>
12
13 <a
14 href={`https://${config.APP_NAME}.hub.loginradius.com/auth.aspx?action=login&return_url=${window.location.origin}/login`}
15 >
16 <button>Login</button>
17 </a>
18</div>
19
20);
21};
22export default LandingPage;By doing this, we are redirecting our application to the LoginRadius Auth Page and are passing the return_url as the current origin. After successful login, the Login component fetches the user profile data as shown in the following step. However, return_url can also be your website, backend server, etc., where you can handle the access token to perform different actions.
Add Login Component
In your components folder, create a src/components/Login.js file and add the following code to retrieve User Profile Data.
1import React from "react";
2import { withRouter } from "react-router-dom";
3import config from "../config";
4class Login extends React.Component {
5constructor(props) {
6super(props);
7this.state = {
8userProfileResponse: null,
9};
10}
11componentDidMount() {
12const token = new URLSearchParams(this.props.location.search).get("token");
13if (token) {
14fetch(
15"https://api.loginradius.com/identity/v2/auth/account?apikey=" +
16config.API_KEY,
17{
18method: "GET",
19headers: {
20Authorization: "Bearer " + token,
21},
22}
23)
24.then((res) => res.json())
25.then((res) => {
26this.setState({ userProfileResponse: res });
27})
28.catch((e) => {
29console.log(e);
30});
31} else {
32window.location.assign(
33https://${config.APP_NAME}.hub.loginradius.com/auth.aspx?action=login&return_url=${window.location.origin}/login
34);
35}
36}
37render() {
38const { userProfileResponse } = this.state;
39return (
40  <div>
41    <span style={{ whiteSpace: "pre-wrap", textAlign: "left" }}>
42      {JSON.stringify(userProfileResponse, null, 4)}
43    </span>
44  </div>
45);
46
47}
48}
49export default withRouter(Login);
The Login component will call the LoginRadius API to fetch the user data by making use of the token obtained upon logging in via the LoginRadius Auth Page.
Add Logout component
In your components folder, create a src/components/Logout.js file and add the code as shown below.
1import React from "react";
2import config from "../config.js";
3const Logout = () => {
4localStorage.removeItem("token");
5return (
6<div class="container">
7<a
8href={https://${config.APP_NAME}.hub.loginradius.com/auth.aspx?action=logout&return_url=http://localhost:3000/}
9>
10<button>Logout</button>
11</a>
12</div>
13);
14};
15export default Logout;This component contains logout functionality. Here, action=logout is passed to the LoginRadius Auth Page, which will log the user out and return them to the Landing Page specified in the return_url.
Full code of the demo can be found on github.
Testing the application
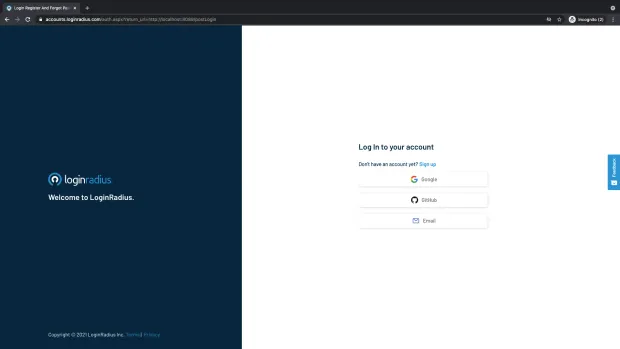
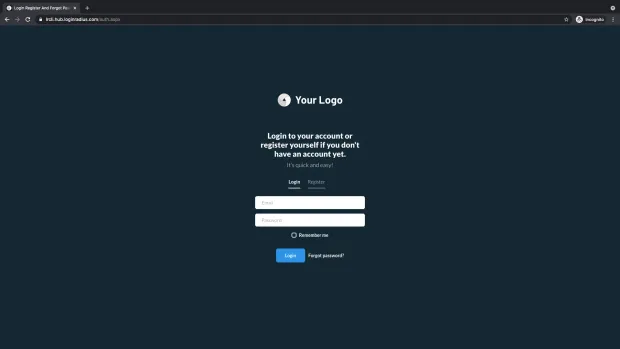
Run the React Application from the command line using npm start. You will be able to see the output on localhost:3000. You can also directly open the IDX page on https://<LoginRadius APP Name>.hub.loginradius.com/auth.aspx?action=register&return_url=http://localhost:3000/login.
Congratulations! You have set up a React Application configured with LoginRadius using LoginRadius CLI. Continue reading to check out some cool and advanced features of the LoginRadius CLI that will help you manipulate and configure the LoginRadius Auth Page for your application through the CLI.
Advanced LoginRadius CLI features
This section explains the use of the LoginRadius CLI in enabling users to quickly and efficiently make changes to the LoginRadius Auth Page configured for their application.
Adding Social Login Methods
We can add social login methods like Google, Facebook, etc., to the LoginRadius Auth Page using the CLI. Use the lr add social command to add a Login method and the lr get social command to view the current active social login methods. Check the image below for a visual representation.
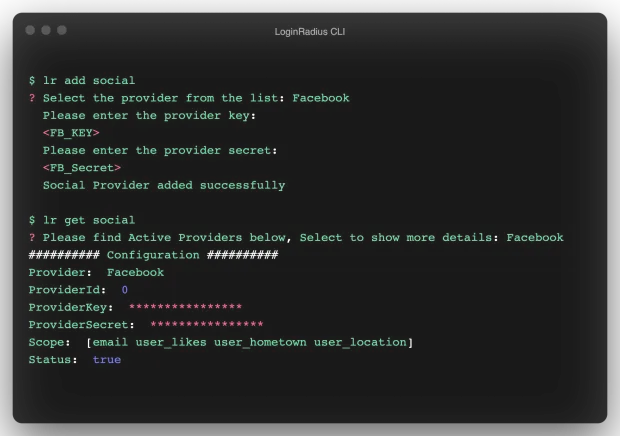
After adding the new login method (in this example, it is Facebook), navigate to the LoginRadius Auth Page by using the lr demo command.

Updating the theme
We can update the theme of the LoginRadius Auth Page using the lr set theme command. You can use the lr get theme command to get a list of all available themes and the currently active theme. See the image below for visual representation.
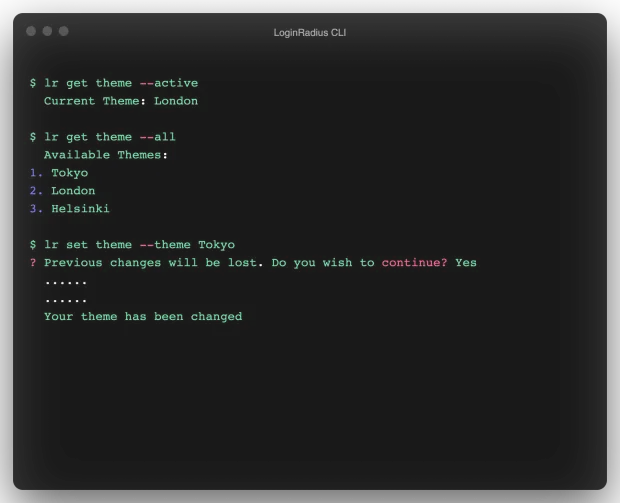
After changing the theme, navigate to the LoginRadius Auth Page using lr demo command to view the changes.
Adding to the Registration schema
This functionality is only available for paid Developer Plans and above (not available for LoginRadius Free plan).
We can update the Registration Page schema using the lr add schema command. Use the lr get schema command with --active or --all flags to get the current Registration fields or view all available fields with their schemas. You can also configure addtional features by choosing the setup advance configuration option.
See the image below for a visual representation of the command flow.
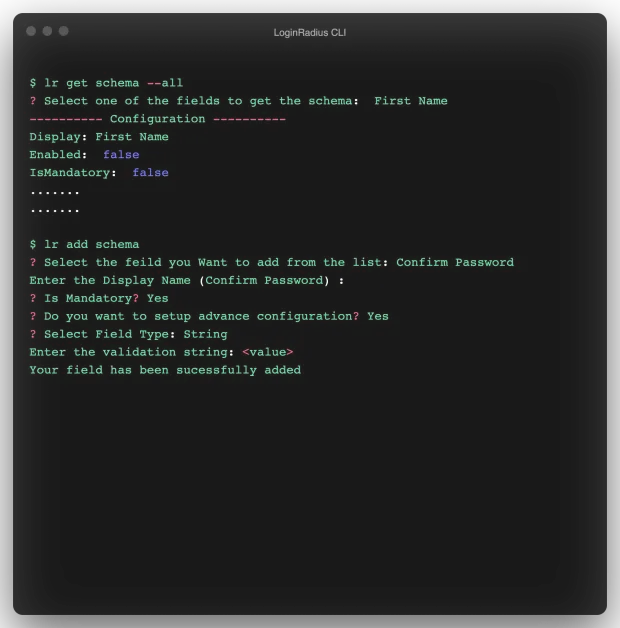
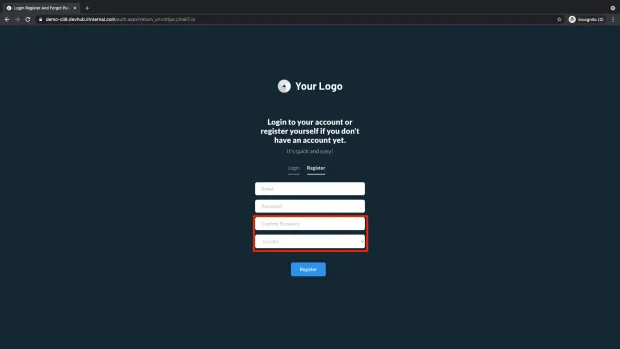
In the below image 2 fields have been added to the registration schema, Confirm Password and Gender. To view the changes, navigate to the LoginRadius Auth Page using lr democommand.
Instead of using the
lr democommand, you can also view the LoginRadius Auth Page by visiting locahost:3000 and following the same workflow as explained earlier.
The entire description for these commands can be found in the LoginRadius CLI Manual.
Contributing to LoginRadius CLI
The LoginRadius CLI is open-sourced under LoginRadius Organization. You are welcome to contribute to it, suggest improvements, or report bugs by following the contributing guidelines. You can also checkout our open source page if you wish to contribute to other opensource projects by LoginRadius.
Your Take
Using the LoginRadius CLI, you can easily setup authentication for your React applications. You can also perform certain LoginRadius functionalities and processes efficiently through the CLI, which saves a bunch of time. LoginRadius will handle all the authentication-related mechanisms so that you can solely concentrate on your application development.
I hope you enjoyed this tutorial and found it to be useful. You can provide feedback or suggestions in the comment section below.
Cheers!!!


