Securing your web applications from unauthorized users is very important. You can increase the security with One Time Password (OTP) authentication in addition to the login credentials. An OTP is sent to the user’s email when they want to log in. This is a form of multi-factor authentication (MFA).
It is essential to learn how to apply Multi-Factor authentication in real-world applications, and this tutorial got you covered. This tutorial explains how to store users’ sessions in the Redis Store and send OTP using Nodemailer for authentication.
Goal
This tutorial helps you understand:
- What is Redis?
- How to utilize the Redis Store?
- How to set up an SMTP service using Nodemailer?
- How to protect routes?
Prerequisites
To follow this tutorial, make sure you have:
- Node Version 16.0+
- Basic knowledge of Node.js
- A Text Editor, preferably Visual Studio Code
As everything is in place, let’s jump right in.
Set Up the Server
In this section, you will learn how to start an Express server.
-
Create a new folder and open it in a text editor. In this tutorial, this folder is named
Multi-Factor Auth, but you can decide to call it anything you want. -
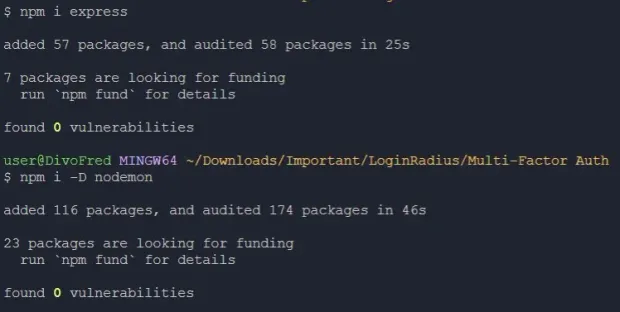
Open the terminal in the project’s path and run the following code to install the dependencies needed to start the Express server.
1npm init --y
2npm i express
3npm i -D nodemon
The Express dependency will be used to set up the backend server and nodemon, installed as a devDependency, which will watch the file system and restart the server when a change is made.
-
Create a new file named
server.jsin the project’s directory. For simplicity, this file will contain all the server code for this application. -
Add the following codes in the
server.jsfile to set up an Express server to listen on port5000.1const express = require("express"); 2const app = express(); 3const PORT = 5000; 4app.listen(PORT, () => { 5console.log(Server running on port ${PORT}); 6}); -
Open
package.jsonand add the following code to start the server.1{ 2 "name": "multi-factor-auth", 3 "version": "1.0.0", 4 "description": "", 5 "main": "server.js", 6 "scripts": { 7 "start": "node server.js", 8 "dev": "nodemon server.js" 9 }, 10 "keywords": [], 11 "author": "", 12 "license": "ISC", 13 "dependencies": { 14 "express": "^4.18.1" 15 }, 16 "devDependencies": { 17 "nodemon": "^2.0.16" 18 } 19} -
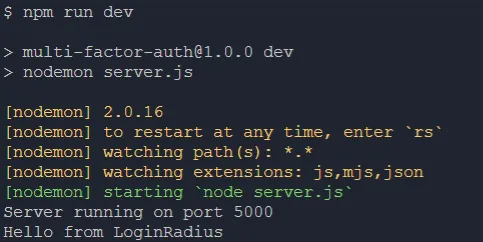
Start the server in development mode by running
npm run devin your terminal.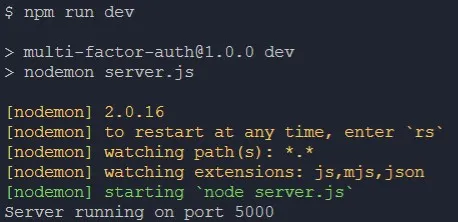
Set Up Nodemailer
Nodemailer is a Node.js module that allows you to send emails using an email service or an SMTP server.
To set up Nodemailer, you need to provide your email or SMTP service credentials.
Google mailing service (Gmail) will not support the use of third-party apps or devices like Nodemailer starting from May 30, 2022.
For this tutorial, we will use Microsoft’s Outlook Maling Service to send emails.
Set Up Outlook
-
Navigate to Outlook’s sign-up page to register for an Outlook account if you don’t have one.
-
Add your phone number if you are prompted to do so.
This step can be skipped.
Sending Emails
After setting up your Outlook account, the next step is to use your Outlook account’s credential to send emails through Nodemailer.
-
Open your terminal and install the
nodejs-nodemailer-outlookdependency.This module only needs your Outlook account credentials and message to send emails.
Now, run the code below in your terminal to install the
nodejs-nodemailer-outlookdependency:1npm i nodejs-nodemailer-outlook -
Import the
nodejs-nodemailer-outlookmodule intoserver.jsand add the configurations needed to send emails:1const express = require("express"); 2const app = express(); 3app.use(express.json());//Enabling the body attribute. 4const PORT = 5000; 5app.post("/auth", (req, res) => {//Post request to 'http://localhost:3000' 6const nodeoutlook = require("nodejs-nodemailer-outlook");//Importing the module 7nodeoutlook.sendEmail({ 8auth: {//Outlook Account Credentials 9user: "<yourOutlookEmail@outlook.com>",//Email 10pass: "<yourOutlookPassword>",//Password 11}, 12from: "<yourOutlookEmail@outlook.com>", 13to: req.body.email,//Getting the email 14subject: "OTP", 15text: req.body.message,//Getting the Message 16onError: (e) => res.status(500).json({ message: an error occurred ${e} }), 17onSuccess: (i) => res.status(200).json({ message: i }), 18}); 19}); 20app.listen(PORT, () => { 21console.log(Server running on port ${PORT}); 22}); -
To test the application, use an API testing application like Postman and make a POST request to
http://localhost:5000/auth, passingemailandmessageto the body of the request.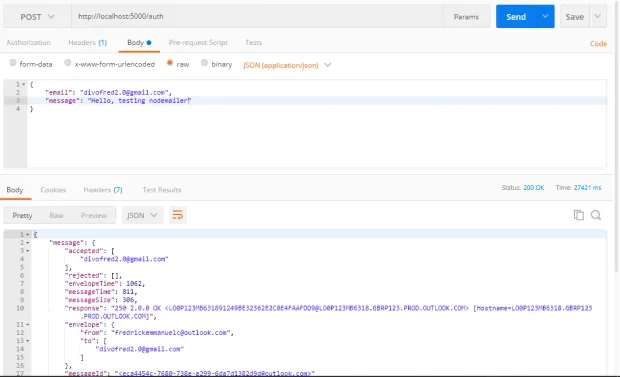
Generate OTPs
In the previous section, you've successfully configured Nodemailer and used it to send emails. This section will show you how to generate a random number and how to add this random number to the message sent to the user.
You can generate this random number using:
Math.trunc(Math.random() * 1000000)- A NodeJS module like UUID, shortid, nanoid, etc.
This tutorial uses the nanoid module to generate random numbers.
-
In the terminal, install the
nanoidmodule. This module will create a random set of characters as the OTP. Run the following command in your terminal:1npm i nanoid@3.3.4 #Version compatible with Nodejs -
After installing the
nanoidmodule, import it intoserver.jsand use it to generate six random digits.1const nanoid = require("nanoid");//Importing the naonid module 2const OTP = nanoid.customAlphabet("1234567890", 6)();//Generating -
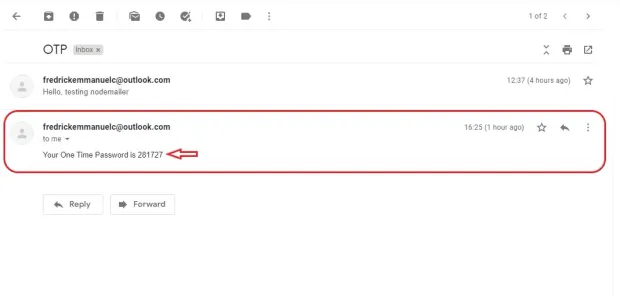
Add the OTP to the message sent to the user’s email.
1const express = require("express"); 2const nanoid = require("nanoid"); 3const app = express(); 4app.use(express.json()); 5const PORT = 5000; 6const OTP = nanoid.customAlphabet("1234567890", 6)(); 7app.post("/auth", (req, res) => { 8const nodeoutlook = require("nodejs-nodemailer-outlook"); 9nodeoutlook.sendEmail({ 10auth: {//Outlook Account Credentials 11user: "<yourOutlookEmail@outlook.com>",//Email 12pass: "<yourOutlookPassword>",//Password 13}, 14from: "<yourOutlookEmail@outlook.com>", 15to: req.body.email,//Getting the email 16subject: "OTP", 17text: Your One Time Password is ${OTP},//Adding the OTP 18onError: (e) => res.status(500).json({ message: an error occurred ${e} }), 19onSuccess: (i) => res.status(200).json({ message: i }), 20}); 21}); 22app.listen(PORT, () => { 23console.log(Server running on port ${PORT}); 24}); -
Make a POST request to
http://localhost:5000/auth, passing only the email address.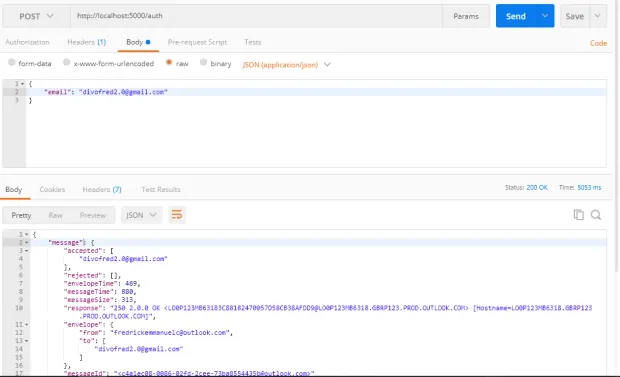
-
Check the email address for which the OTP is sent.
Redis
Now that the OTP part of the authentication is settled, let’s set up the next part of the authentication. This section covers what Redis is and how to use the Redis Store to cache data.
What is Redis?
Redis, also known as Remote Dictionary Server, is an open-source (BSD licensed), in-memory data structure store. Developers use it as a database, cache, and message broker. It is a fast, lightweight database that structures data in key-value pairs.
Redis Cache
Storing and retrieving cached data from Redis is faster than traditional databases as it retrieves and stores data in the main memory (the RAM). The data can be users’ sessions or responses to requests.
The only downside is that data can be lost if the computer crashes.
Setting up Redis
Setting up Redis locally for Linux and Mac computers is simply straightforward.
For Windows, you need to install Windows Subsystem for Linux Version 2 (WSL 2) and a Linux Distro on your local machine.
This tutorial uses Redis Cloud to set up the Redis database. Redis Cloud starts with Free a subscription fee that grants 30MB of storage. This is perfect for this simple application.
-
Create a new Redis Cloud account if you don’t have one.
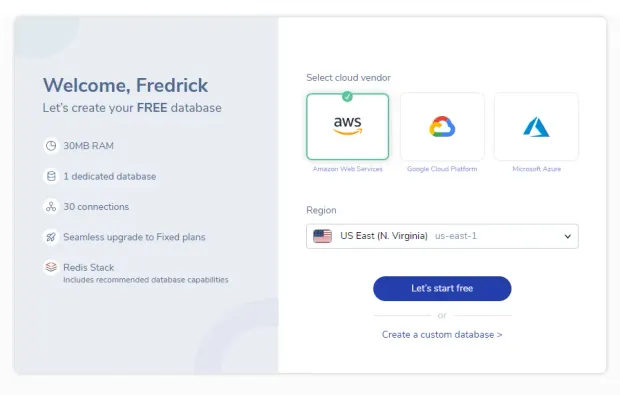
-
Click on Let’s start free and let Redis create a cloud database.
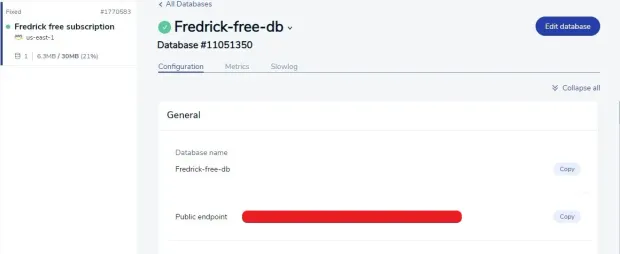
-
Click on Configurations and copy your Public endpoint. This endpoint will be used to set up the Redis application.
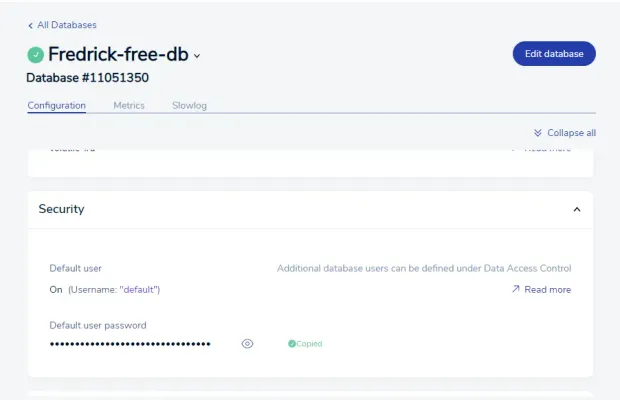
-
Still on the Configurations tab, copy your Default user password.
-
Run
npm i redisin your terminal. Import theredisdependency intoserver.js, and set up theredisClientusing the Redis cloud endpoint.1const redis = require("redis"); 2const redisConnect = async () => {//This function will be removed later in the tutorial 3try { 4const redisClient = redis.createClient({ 5url: "redis://redis-12345.c80.us-east-1-2.ec2.cloud.redislabs.com:12345", //This is an incorrect end point, insert your Public endpoint 6port: 12345,//The PORT is the last five digits in the url 7username: "default", 8password: "1234567890ABCDEFGHIJKLMNOPQRSTUV",//Input your Default_user_password 9}); 10await redisClient.connect();//Connecting to Redis Cloud 11await redisClient.set("Hello", "Hello from LoginRadius");//key=Hello, value=Hello from LoginRadius 12const Hello = await redisClient.get("Hello");//Getting the value using its key=Hello 13console.log(Hello); 14} catch (error) { 15if (//Running the function again when there is a network error 16error.message === 17"getaddrinfo ENOTFOUND redis-12345.c80.us-east-1-2.ec2.cloud.redislabs.com:12345" || 18error.message === 19"getaddrinfo EAI_AGAIN redis-12345.c80.us-east-1-2.ec2.cloud.redislabs.com" 20) { 21return redisConnect(); 22} 23console.log(error.message); 24} 25}; -
Start up the server in your terminal and view the result.
Sessions
Now that Redis has been added to the application, let’s set up users’ sessions using Express Sessions.
Set Up Express Sessions
-
Install the
express-sessionandconnect-redismodules in your terminal.The
express-sessionmodule allows you to create a session in the client’s browser. And theconnect-redismodule enables you to set Redis as the session store. Run the following command in your terminal.1npm i express-session connect-redis -
Import
express-sessionandconnect-redisintoserver.jsand configure the session store.1const express = require("express"); 2const app = express(); 3const redis = require("redis"); 4const session = require("express-session");//Importing express session 5const RedisStore = require("connect-redis")(session);//Importing connect-redis and passing the session 6const redisClient = redis.createClient({ 7url: "redis://redis-12345.c80.us-east-1-2.ec2.cloud.redislabs.com:12345", //This is an incorrect end point, insert your Public endpoint 8port: 12345,//The PORT is the last five digits in the url 9username: "default", 10password: "1234567890ABCDEFGHIJKLMNOPQRSTUV",//Input your Default_user_password 11legacyMode: true, //Very important for Redis V4 12}); 13redisClient 14.connect() 15.then(() => console.log("connected"))//Logs out connected on successful 16.catch((e) => console.log(e.message));//Logs out the error 17app.use( 18session({ 19secret: "LoginRadius",//session secret key 20resave: false, 21saveUninitialized: false, 22store: new RedisStore({ client: redisClient }),//Setting the store 23}) 24); 25//The Rest of the code
Storing OTPs
Attributes stored in a session without a database are removed after the server refreshes. With the help of Redis cache, attributes in a session can be retrieved fast and saved even when the server restarts.
The user’s OTP should be saved in the session before sending it to the user’s email.
Open your server.js file and add the code as follows.
The following code stores the OTP in the session, redirects when the email has been sent, and verifies the OTP provided with the one stored in the session.
1app.post("/auth", (req, res) => {
2  let OTP = nanoid.customAlphabet("1234567890", 6)();//Changing the OTP
3  req.session.OTP = OTP;//Storing the OTP in the
4  const nodeoutlook = require("nodejs-nodemailer-outlook");
5  nnodeoutlook.sendEmail({
6    auth: {//Outlook Account Credentials
7      user: "<yourOutlookEmail@outlook.com>",//Email
8      pass: "<yourOutlookPassword>",//Password
9    },
10    from: "<yourOutlookEmail@outlook.com>",
11    to: req.body.email,//Getting the email
12    subject: "OTP",
13    text: `Your One Time Password is ${OTP}`,
14    onError: (e) => res.status(500).json({ message: `an error occurred ${e}, Please try again` }),
15    onSuccess: (i) => res.redirect("/verify"),//Redirecting the user to verify the token
16  });
17});
18app.get("/verify", (req, res) => {
19res.send("Welcome to the verify route");//Welcome Message
20console.log(req.session.OTP);//Logging out the OTP stored in the session.
21});
22app.post("/verify", (req, res) => {
23const { OTP } = req.body;//Getting the user provided OTP
24const OTPSession = req.session.OTP;//Getting the stored OTP
25if (OTPSession) {//Checking if the OTP exist in the session
26if (OTP === OTPSession) {//Verifying the similarity of the OTP
27req.session.isAuth = true;//Setting auth to true
28return res.status(200).json({ message: "OTP is correct" });
29}
30return res.status(401).json({ message: "Incorrect OTP" });
31}
32return res.status(404).json({ message: "OTP not found" });
33});
Protecting Routes
Preventing unauthorized/unauthenticated users from accessing a specific route or a piece of important information is essential in various applications. In this section, you'll learn how to create a middleware that will authenticate the users accessing a specific route.
In this tutorial, the protected route is
/home
-
Create a
GETroute to/homeinserver.jsand add the middlewareauth1app.get("/home", auth , (req, res) => { 2 res.send("You have Successfully been Authenticated"); 3}); -
Create the
authmiddleware function and verify if the user is authenticated.1const auth = (req, res, next) => {//auth middleware function 2if (req.session.isAuth) {//Checking if isAuth = true 3return next(); 4} 5return res.redirect("/auth");//Redirecting the Login route 6}; 7app.get("/auth", (req, res) => {//Login route 8res.send("Login"); 9}); 10app.get("/home", auth, (req, res) => {//The Home route 11res.send("You have Successfully been Authenticated"); 12});
Logout
The logout route will also be protected using the auth middleware to prevent requests from users who are not signed in.
1app.post("/logout", auth, (req, res) => {
2  req.session.destroy();//Destroying the session
3  res.redirect("/auth");
4});
Set Up the Frontend
It’s time to put the backend code into actual functionality. This tutorial makes use of Embedded JavaScript Template (EJS) as the frontend of this application.
Setting up EJS
-
Install the EJS Module
1npm i ejs -
Once the installation is complete, open your
server.jsand useejsas the default view engine1app.set("view engine", "ejs") -
In this application, there are only three routes. The login, verify, and home routes. You need to render an
ejsfile when accessing the routes.Modify the
GETroutes using the code as follows:1app.get("/auth", (req, res) => { 2 res.render("login");//Rendering the login ejs file 3}); 4app.get("/verify", (req, res) => { 5 res.render("verify");Rendering the verify ejs file 6}); 7app.get("/home", auth, (req, res) => { 8 res.render("home");Rendering the home ejs file 9}); -
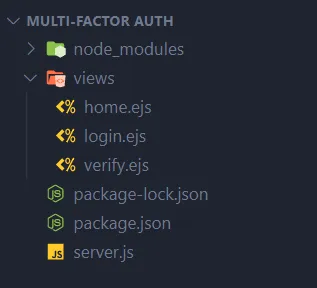
Create a folder named
views, and inside, create the variousejsfiles.When the server is rendering an ejs file, it checks in the views folder for the file. So, this name is not optional.
Style these various routes as you like
Login Route
Add the following code to login.ejs to set up the Login route.
1<!DOCTYPE html>
2<html lang="en">
3<head>
4  <meta charset="UTF-8">
5  <meta http-equiv="X-UA-Compatible" content="IE=edge">
6  <meta name="viewport" content="width=device-width, initial-scale=1.0">
7  <title>Login</title>
8</head>
9<body>
10  <h1>Login Page</h1>
11  <p>Please Sign in</p>
12  <form>
13    <input type="email" class="email"/><!-- Email input -->
14    <input type="submit" value="submit" class="submit"/>
15  </form>
16  <script>
17    const form = document.querySelector('form')//Getting the form
18    const email = document.querySelector('.email')//Getting the email
19form.addEventListener('submit', async(e)=> {//Listening for a submit
20  e.preventDefault()
21  const data = { email: email.value }//Getting the email
22  await fetch("/auth", {//Making a POST request to http://localhost:5000/auth
23    method: "POST",
24    headers: {
25      "Content-Type": "application/json",
26    },
27    redirect: "follow",//Permiting redirects
28    body: JSON.stringify(data),//Sending the email
29  }).then(res => {
30    if(res.redirected) location.href = res.url//Redirecting the user on success
31  })
32  .catch((e) => {
33     email.value = ''
34     console.log(e.message);//Logging out error
35    });
36})
37
38</script>
39</body>
40</html>
Verify Route
Open verify.ejs and set up the verify page as follows.
1<!DOCTYPE html>
2<html lang="en">
3<head>
4  <meta charset="UTF-8">
5  <meta http-equiv="X-UA-Compatible" content="IE=edge">
6  <meta name="viewport" content="width=device-width, initial-scale=1.0">
7  <title>Login</title>
8</head>
9<body>
10  <h1>Verify Page</h1>
11  <p class="message">Enter your OTP</p><!-- Message alert -->
12  <form>
13    <input type="number" class="OTP" /><!-- OTP input -->
14    <input type="submit" value="submit" class="submit" />
15  </form>
16<script>
17const form = document.querySelector('form')//Getting the form
18const OTP = document.querySelector('.OTP')//Getting the OTP
19const message = document.querySelector('.message')//Getting the message alert
20form.addEventListener('submit', async (e) => {//Listening for a submit
21  e.preventDefault()
22  const data = { OTP: OTP.value }//Getting the OTP
23  await fetch("/verify", {//Making a POST request to http://localhost:5000/verify
24    method: "POST",
25    headers: {
26      "Content-Type": "application/json",
27    },
28    redirect: "follow",//Permitting redirects
29    body: JSON.stringify(data),//Sending the OTP
30  }).then(async(res) => {
31    if(!res.ok){//Checking for errors
32      const data = await res.json()
33      OTP.value = ''
34      return message.textContent = data.message//Alerting the error
35    }
36    if (res.redirected) location.href = res.url//Redirecting the user on success
37  }).catch((e) => {
38      OTP.value = ''
39      console.log(e.message)
40    });
41})
42
43</script>
44</body>
45</html>
Home Route
This is the route that is protected. The page can contain sensitive information that must not be accessible to unauthenticated users.
Open home.ejs and configure the home route as follows.
1<!DOCTYPE html>
2<html lang="en">
3<head>
4  <meta charset="UTF-8">
5  <meta http-equiv="X-UA-Compatible" content="IE=edge">
6  <meta name="viewport" content="width=device-width, initial-scale=1.0">
7  <title>Login</title>
8</head>
9<body>
10 <h1>Home Page</h1>
11 <p>Hello authenticated user, This is a secret information for your eyes only😉</p>
12 Want to be unauthenticated, <button>Sign Out</button><!-- Sign Out button -->
13 <script>
14   const button = document.querySelector('button')//Getting the sign out button
15   button.addEventListener('click', async()=> {//Listening for a click
16     await fetch('/logout', {//Making a POST request to http://localhost:5000/logout
17       method: "POST",
18       headers: {
19         "Content-Type": "application/json",
20       },
21       redirect: "follow"//Permitting redirects
22     }).then((res)=> {
23       if (res.redirected) location.href = res.url //Redirecting the user on success
24     }).catch(e=> {
25       console.log(e.message)
26     })
27   })
28 </script>
29</body>
30</html>
Conclusion
This tutorial taught you how to set up Nodemailer, Redis Cloud, and Multi-Factor Authentication. With these, you've learned to secure your applications from unauthenticated users.
Do you think you can use this to build complex and scalable applications?
MFA with LoginRadius
You can also set up MFA with LoginRadius instead of setting up everything manually with Redis. You can sign up for a free account here.
Refer to this developer-friendly documentation to get started with your MFA setupdocs/guide/mfa/) for your web and mobile apps.
Resources
Click here to access the sample code used in this tutorial on GitHub


