In modern websites that serve different kinds of users, there is a need to create a distinction between users to determine what kind of privileges are assigned to them. You can achieve this with authentication. Through authentication, we validate user-specific credentials to determine if the user is genuine and then assign a specific role, which could be a simple client or administrator access, for example.
React user authentication is usually carried out by using a trusted third-party customer identity and access management (CIAM) software. This tutorial uses LoginRadius API to carry out user authentication with React application.
Prerequisites
You should know React to be able to follow this tutorial. Also, you should have the node package manager or yarn installed on your PC.
Overview
First, you need to install the LoginRadius React SDK. You can then configure it to provide authentication and role assignment for use within your React application.
Introduction
What is LoginRadius?
LoginRadius is a SaaS-based customer identity and access management (CIAM) system with features to manage customer identity, privacy, and access. It is a simple, implementable solution for adding user authentication and authorization to your website.
LoginRadius has features to add different login authentication options, including email, phone, and social network logins, such as Google and Facebook. It also provides security on these data. Some security features it offers include:
- Accessing the Admin Console: Generally, this is where we can control authentication factors regarding our apps.
- Using API Secret: A unique generated key to access our API.
- Multi-Factor Authentication: This features covers two-factor authentication.
- SSL Verification
LoginRadius comes with different SDKs, including reactjs authentication, to support different frameworks. One of them is the LoginRadius ReactJS SDK, which allows you to add authentication within your React app.
Getting Started
Creating a LoginRadius Account
First, you need to create a LoginRadius account with a Developer Pro plan selected instead of the free plan. This is to be able to access role management features, which are only available in the Developer Pro plan.
You'll get a page requesting you to create a new application. Click on "create a new application". After which, a page comes up where you should enter the name of your app and the URL to your app. Here, Input any name and URL of your choice.

Auth Page (IDX)
LoginRadius allows you to create a custom login page (an auth page that you can customize from the dashboard), which you can then preview. This is a page provided by LoginRadius that you can easily customize to contain different form contents. Features like user log in, signup, email, and password have been pre-implemented on this page. You'll be using this page for registration and authentication with react application. To learn more on how to customize this page to contain more form contents, refer to customizing Auth Page.

To be able to use user roles within your app, you first have to set up these roles and their respective privileges from the dashboard. In this tutorial, you'll set up two roles, namely Admin and Client.
To set up roles, navigate to your dashboard, click on "user management".
Click on "manage roles" and click on "add roles". A popup opens in which you add the role name. And in the permission tab, add what permissions that role should have.
This tutorial has added a "client" role with a permission called "view" and an "admin" role with permissions: "view, edit, delete". Enable "set as default" for the client role to automatically assign the client role to any user in our app by default.

Integrate LoginRadius into React
Creating a React Application
To build your application, you'll be using the command-line interface (CLI) with create-react-app
For node users:
1npx create-react-app {project name}Alternatively, if you're using yarn, write:
1yarn add create-react-app {project name}Next, cd into the directory with the command below:
1cd {project name}Configuring LoginRadius for React
Next, you'll install the LoginRadius React dependency using the CLI:
For node users:
1npm install loginradius-reactyarn:
1yarn add loginradius-reactTo use the react-router components, you need to install react-router-dom using CLI. Run the following code to achieve this:
For node:
1npm install react-router-domyarn:
1yarn add react-router-domSetup a .env file in the root directory with the following details:
1REACT_APP_LR_APP_NAME={app name}
2REACT_APP_API_KEY={your app key}
3REACT_APP_SECRET={your secret key}
You can find the keys required above in your dashboard within react user authentication configuration: API key and secret.
Building Login Components
The Auth Page(IDX) is a web page created for you that reflects the configurations you create in our dashboard. You'll utilize this page as the login and signup page within your app and set up routes to route users to a different page based on their roles.
Go to the index.js file and add:
1import React from "react";
2import ReactDOM from "react-dom";
3import App from "./App";
4import { LRAuthProvider } from "loginradius-react";
5ReactDOM.render(
6<React.StrictMode>
7<LRAuthProvider
8appName={process.env.REACT_APP_LR_APP_NAME || ""}
9apiKey={process.env.REACT_APP_API_KEY || ""}
10redirectUri={window.location.origin}
11
12
13<App />
14
15</LRAuthProvider>
16</React.StrictMode>,
17document.getElementById("root")
18);In the above code, you made imports for required modules, set up your LRAuthProvider component with parameters appname and apikeys from your .env file, and also created your redirect URI. In this case, it is equal to your current window.location.origin, which is the URL of the webpage -- in this case, it is our localhost.
Localhosts are whitelisted by default. If you're building your app using a hosted site, you have to whitelist the URL in your dashboard. The entry component in the code is set to the App component.
In the App.js component, add the following code:
1import React from 'react';
2import './App.css';
3import {
4BrowserRouter as Router,
5Switch,
6Route
7} from "react-router-dom";
8import Auth from "./Landing";
9import CallAPI from './Return';
10function App() {
11return (
12<Router>
13<div className="App">
14<Switch>
15<Route exact path="/">
16<div>{"Application home"}</div>
17<Auth />
18</Route>
19<Route path="/login">
20<CallAPI />
21</Route>
22</Switch>
23</div>
24</Router>
25);
26}
27export default App;
Here, you've set up your routes using Browser routes, Switch, and Route components imported from the react-router-dom module. The path to your home page is blank ("/"). It displays the text Application home. It runs an Auth component that was earlier imported. A second route is made for a second page with a path of "/login" that runs the CallAPI component on the new page.
You'll then create a page that will serve as the landing page for your site. To do this, create a Landing.js file in your src folder and input the following code:
1import { useLRAuth } from "loginradius-react";
2const Auth = () => {
3const {isAuthenticated,loginWithRedirect,logout } = useLRAuth();
4if (isAuthenticated) {
5return (
6<div>
7<button onClick={() => logout()}>
8Log out
9</button>
10</div>
11);
12} else {
13return <button onClick={() => loginWithRedirect("/login")}>Login/Register</button>;
14
15}
16};
17export default Auth;In the code written above, you've used loginWithRedirect, loginWithPopup, and logout authentication methods from the useLRAuth hook in your components to set up the authentication flow within your React application. You can also get access to the authentication state using isAuthenticated. The isAuthenticated method is used to check if the user is already logged into the app; it true, it returns true and displays a log out button that is connected to a logout function. Else, it returns false and displays a Login/Register button, which when clicked is set up to redirect to the path /login. The loginWithRedirect() and logout() methods use the Auth Page (IDX), where registration and login functionality is already implemented to perform these tasks.
You can style the button to make it easier to see by adding the following code within your App.css file:
1//for our login button on our landing page
2button{
3  background-color: #2d56da;
4  color: #fff;
5  padding: 20px;
6  border-radius: 8px;
7}
8//for the output in our login route which we will cover later
9span{
10  font-size: 24px;
11  height: 80vh;
12  width: 100%;
13  display: flex;
14  justify-content: center;
15  align-items: center;
16  text-align: center;
17}
Using the LoginRadius API
As an additional feature, you can use the LoginRadius React SDK to access the API to get parameters that are assigned upon logging in using the login form. You can use this method to check if a user is a client or administrator. Whenever a user creates an account using the form, the user is assigned a unique user-id called Uid, which you can view in your dashboard under "manage users". You can reference this user-id to determine your users’ roles. To do this, you need to fetch and return the Uid of the current user. The fetch request for the user role requires the Uid and your app secret key as parameters within the URL.
In your src folder, create a file name return.js, and populate it with the following code:
1import React, { useEffect, useState } from "react";
2import { useLRAuth, withAuthenticationRequired } from "loginradius-react";
3const CallAPI = () => {
4const [resp, setResp] = useState(null);
5const { user } = useLRAuth();
6const uid = user["Uid"];
7useEffect(() => {
8(async () => {
9try {
10const response = await fetch(
11https://api.loginradius.com/identity/v2/manage/account/${uid}/role?apiKey=${process.env.REACT_APP_API_KEY}&apiSecret=${process.env.REACT_APP_SECRET},
12{}
13);
14setResp(await response.json());
15} catch (e) {
16console.error(e);
17}
18})();
19});
20if (!resp) {
21return <div>Loading...</div>;
22}
23return <span>{JSON.stringify(resp, null, 2)}</span>;
24};
25export default withAuthenticationRequired(CallAPI, {
26onRedirecting: () => <div>Loading...</div>,
27});
Here, within your CallAPI component, you've used usestate hook to create two states resp and setResp to check if you have received a response from the API. A constant user was made to use the LAuth method to get the current user data, and then the next line gets the id of the current user. The useeffect React hook that runs after the render contains an asynchronous function is used to fetch the role of the current user uid. It returns the data and outputs it in JSON form, which value is given to SetResp. Else, it throws an error if the fetch request fails.
Since it is an asynchronous function, the code below it runs while fetching and awaiting a response. resp is false during this time while waiting for the result of the asynchronous function. Therefore, it outputs "Loading..." on the screen until the async returns the data that it then outputs.
The last code block: export is simply used to show "Loading..." on the screen during redirecting.
Running the Code
You can run the present code by cd into your parent directory and running:
1npm startWhen it successfully starts the server, you would have a similar page as follows:
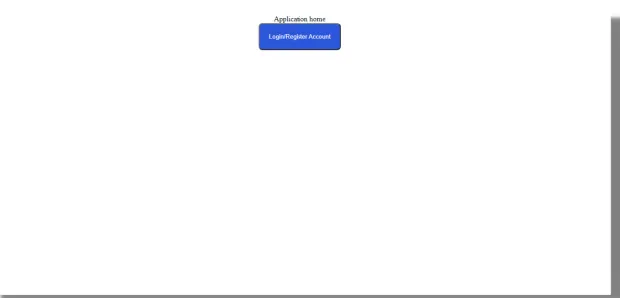
This is the landing page you've built in the Auth component and is your / path in your routes within App.js. If you click on the "login/register" button, you'll be redirected to your custom Auth Page (IDX) provided by LoginRadius, where you can create a user account and login. You can manage the users who have accounts from your dashboard in "manage users".
After logging in auth react js, with your user, you'll get redirected to the /login route that then runs the CallAPI component and gives you a result similar to the following:
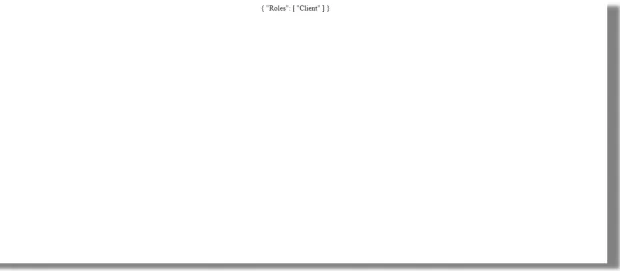
This is the current role of the user. Any user would have the role of client assigned since you've set to assign the client role by default to all our users from your dashboard during the creation of roles.
Managing User Authentication and Data
User Authentication
In the above section, you've created a user account with different parameters for the email and password. Upon creation of an account, you get directed to the login page, where you can sign in using the credentials of the created account. Authentication was carried out on the parameters in the input field by the LoginRadius API set up in the Auth Page.
Your user authentication is carried out by the API. This checks the input details against the registered user details. If any input not matching this is put in the form, you'll get an alert "user does not exist" upon clicking the login button. Upon logging in, your app key and secret are sent by your app to the authentication server. Upon authentication, the server responds with an access token and authorizes the user. To view this token, you can create a new file called Token.js and insert the following code into it:
1import React, { useEffect, useState } from "react";
2import { useLRAuth, withAuthenticationRequired } from "loginradius-react";
3const CallAPI = () => {
4const { getAccessTokenSilently } = useLRAuth();
5const [resp, setResp] = useState(null);
6useEffect(() => {
7(async () => {
8try {
9const token = await getAccessTokenSilently();
10const response = await fetch(
11https://api.loginradius.com/identity/v2/auth/access_token/validate?access_token=${token}&apiKey=${process.env.REACT_APP_API_KEY},
12{}
13);
14setResp(await response.json());
15} catch (e) {
16console.error(e);
17}
18})();
19}, [getAccessTokenSilently]);
20if (!resp) {
21return <div>Loading...</div>;
22}
23return (
24<span>{JSON.stringify(resp, null, 2)}</span>
25);
26};
27export default withAuthenticationRequired(CallAPI, {
28onRedirecting: () => <div>Loading...</div>,
29});
The code above runs a fetch request for the access token and displays it when the data is returned. To view the output of this code, import the newly created file into your App.js file. Since the name of the function component in the code is still CallAPI, you don't need to edit the component called in the login route. You just need to comment out the former import for the component from your return.js file as shown below:
1import "./App.css";
2import { BrowserRouter as Router, Switch, Route } from "react-router-dom";
3import Auth from "./Landing";
4// import Login from "./Login";
5import React from 'react';
6// import CallAPI from './Return';
7 import CallAPI from './Token';
8function App() {
9return (
10<Router>
11<div className="App">
12<Switch>
13<Route exact path="/">
14<div>{"Application home"}</div>
15<Auth />
16</Route>
17<Route path="/login">
18<CallAPI />
19</Route>
20</Switch>
21</div>
22</Router>
23);
24}
25export default App;
You then need to run the code by starting the server using the npm start command. Upon starting the server, when you log in, you'll have your user token displayed on the screen. Your output will be similar to the following:
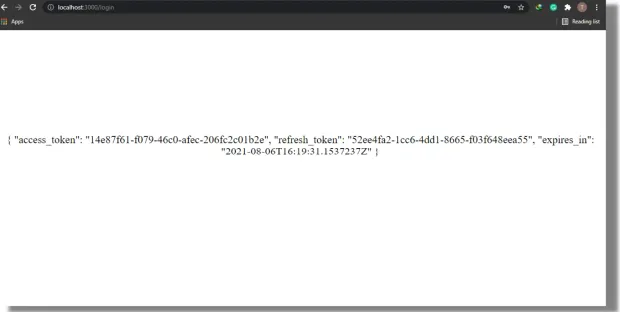
Here, you can see the access token and its details. You can then return your code to the previous CallAPI component imported from Return.js.
User Data
You can view and manage user accounts from the dashboard. You can find the panel for this under "User management":

Manage users:

Here, you can view the account information of your users, search for a particular user details using the email, Uid, or phone number as the query in the search box. Also, the panel provides an option to reset the password of a user, block users, and delete users as the above image shows. You can create new users by clicking on the "add user" button and filling in the details of the new user.
Viewing User Permissions
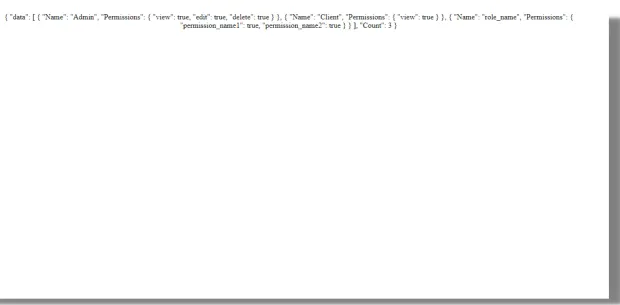
To view all roles and permissions for your app, change the URL in the fetch request to https://api.loginradius.com/identity/v2/manage/role, keeping the rest of the URL the same. That is, it still contains your appkey and appsecret parameters.
Reload your page, and you'll have an output similar as follows:
Adding a Role to the Current User
To add the Admin role to the current user, create objects for this by adding the following code within the parenthesis after your fetch URL:
1method: "PUT",
2     headers: {
3      'Content-Type': 'application/json',
4     },
5     body: JSON.stringify({
6      roles: ["Admin"],
7     }),
This adds the Admin role to the current logged-in user since it is the Uid that is within our URL. fetch uses a GET request by default. Since you're making a change to the URL, you're using a PUT method instead. You'll get a result similar to as follows:
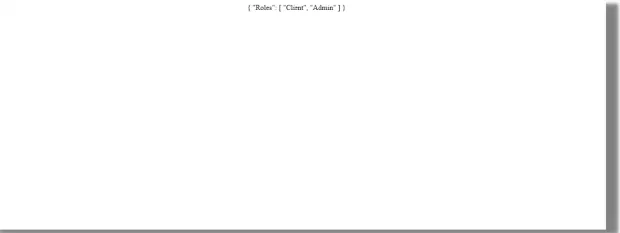
The user has both client and admin roles because you've added client roles by default to all our users.
Assigning Client and Admin roles
To assign specific roles to different people, first you should uncheck the set as default in the "manage roles" section of your dashboard. You can then run an if block to check if the users’ logged-in emails are equal to a particular set of emails and then perform the assignment of admin roles to them; else, assign the client roles instead. Modify your return.js file as below:
1import React, { useState } from "react";
2import { useLRAuth, withAuthenticationRequired } from "loginradius-react";
3const CallAPI = () => {
4const [resp, setResp] = useState(null);
5const { user } = useLRAuth();
6const uid = user["Uid"];
7var response;
8const email = user["Email"];
9var emailmain = email[0].Value;
10(async () => {
11if (emailmain.toLowerCase() === "admin@example.com"){
12try {
13    response = await fetch(
14      `https://api.loginradius.com/identity/v2/manage/account/${uid}/role?apiKey=${process.env.REACT_APP_API_KEY}&apiSecret=${process.env.REACT_APP_SECRET}`,
15      {
16        method: "PUT",
17        headers: {
18          'Content-Type': 'application/json',
19        },
20        body: JSON.stringify({
21          roles: ["Admin"],
22        }),
23      }
24    );
25    setResp(await response.json());
26  } catch (e) {
27    console.error(e);
28  }
29}
30else {
31   try {
32     response = await fetch(
33       `https://api.loginradius.com/identity/v2/manage/account/${uid}/role?apiKey=${process.env.REACT_APP_API_KEY}&apiSecret=${process.env.REACT_APP_SECRET}`,
34       {
35         method: "PUT",
36         headers: {
37           "Content-Type": "application/json",
38         },
39         body: JSON.stringify({
40           roles: ["Client"],
41         }),
42       }
43     );
44     setResp(await response.json());
45   } catch (e) {
46     console.error(e);
47   }
48}
49
50})();
51if (!resp) {
52return <div>Loading...</div>;
53}
54return <span>
55Welcome user : {uid}<br/>
56Email : {emailmain}<br/>
57{JSON.stringify(resp, null, 2)}
58</span>;
59};
60export default withAuthenticationRequired(CallAPI, {
61onRedirecting: () => <div>Loading...</div>,
62});
In the code above, you've created a const email that returned an array containing the user email. To get the email specifically, you've created another variable emailmain which gets the value at a particular array position containing the user email.
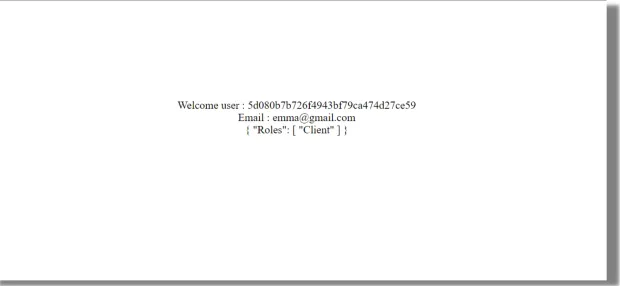
The async request block has now been modified to check if the user email being used for logging in is equivalent to a particular email which you've declared. Alternatively, you can have your emails pulled from a database and assign the admin roles to the ones you want. The else block assigns a client role to emails that do not meet the first criteria. When you create a new account with an email similar to what I have in the if block, that is admin@example.com; when rerouted to the /login path, you'll discover that the role of admin was assigned while any other email will have the client role assigned upon login. The return statement returns the user id of the logged-in user, the email, and then the role in a JSON format. The output would be similar to the following:
Conclusion
This tutorial covered:
- Setting up LoginRadius with a React app
- Using the setup to authenticate users and assigning specific roles with different privileges
These privileges can be used to give users certain permissions as to what they can do on your website.
LoginRadius is a great tool and is easy to implement if you want to implement authentication in your application.
A working version of the code used in this tutorial is available on Github.


